Long time no write. Anyhow, I backed the reprint of KD:M and have been slowly building out models. Most of the monster and armor sets are fairly straight forward to build. You can check out www.vibrantlantern.com or build.kindgomdeath.com to get visual instructions for most things. Generally the builds are not hard, but rather tedious given the scale and detail. Damn those Phoenix hands, though.
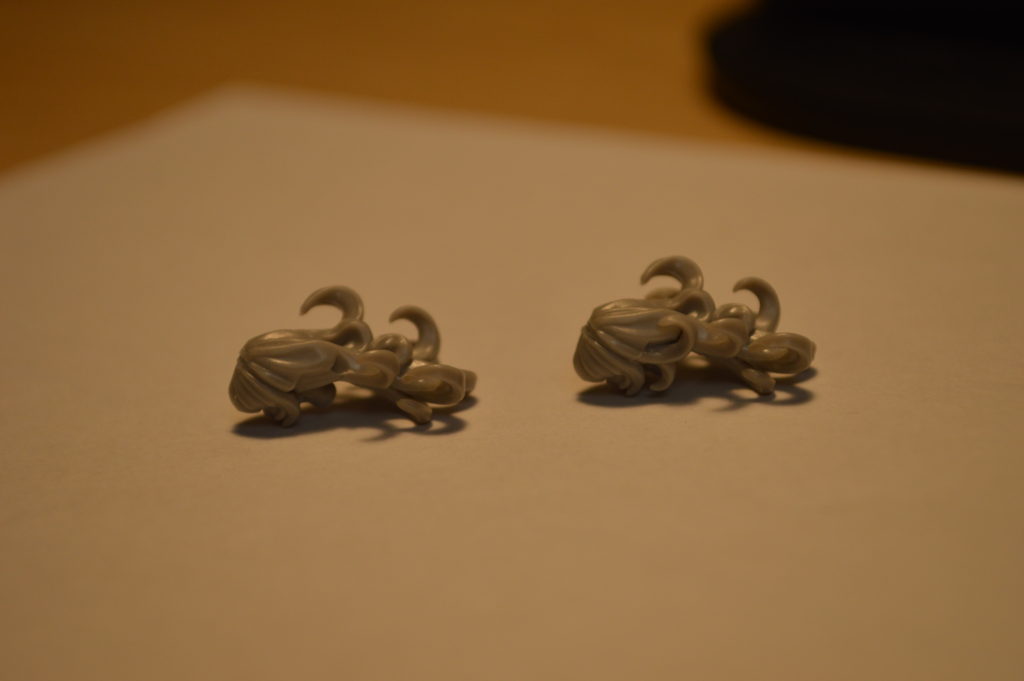
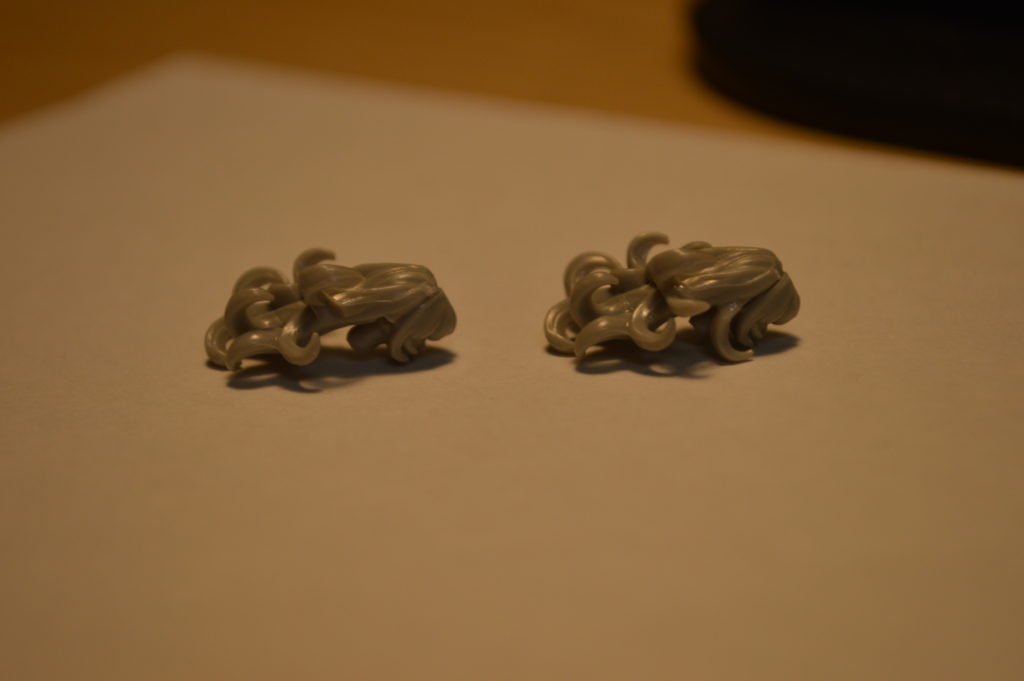
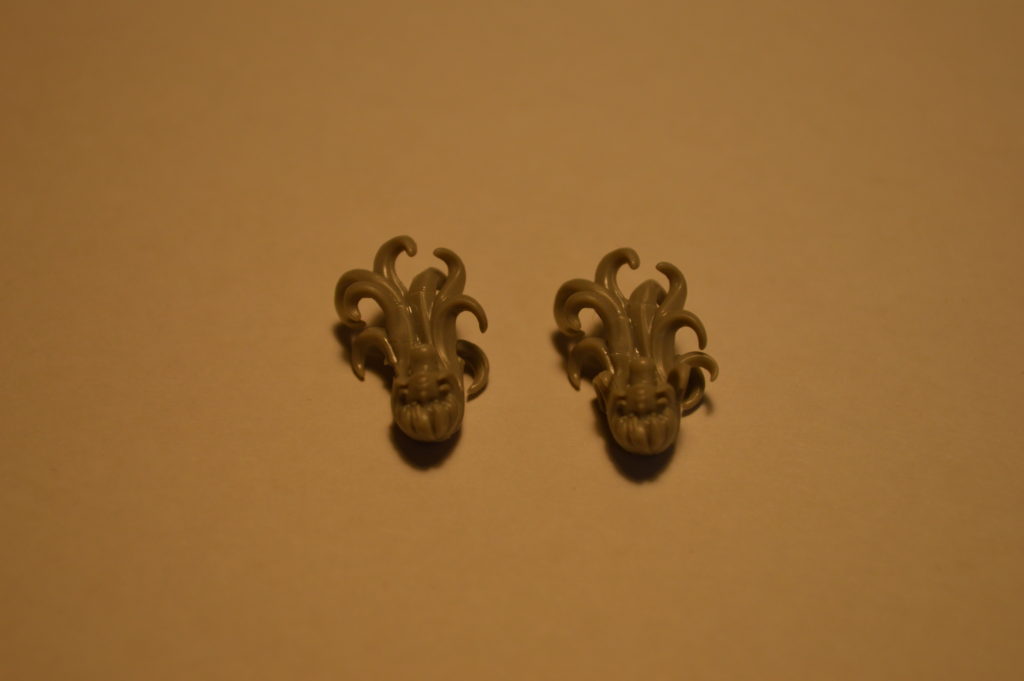
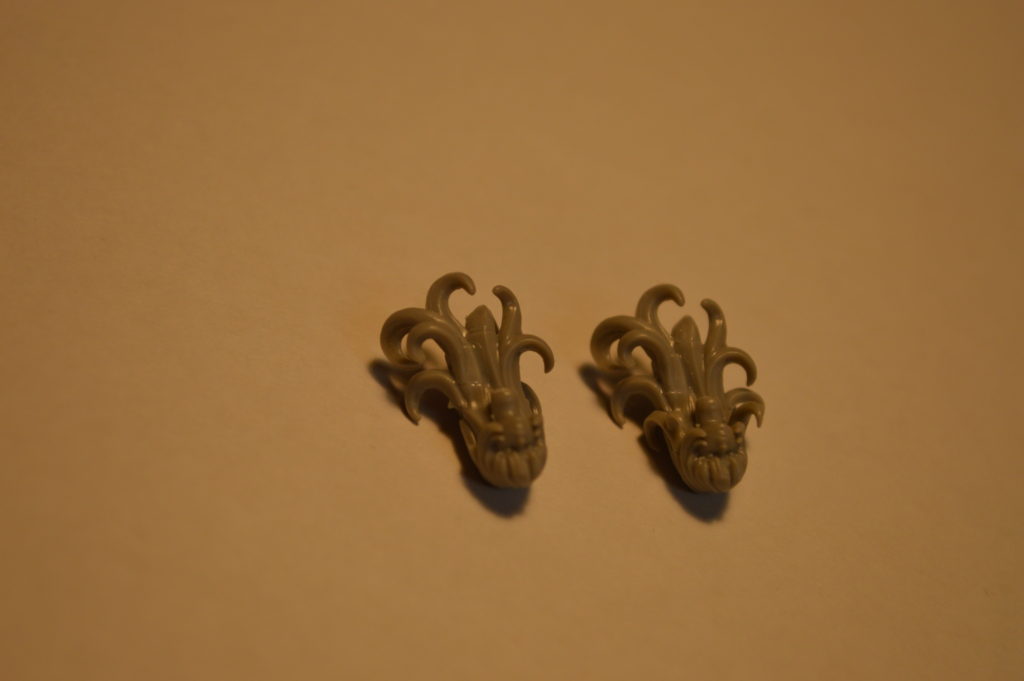
As I worked on the unarmored survivors, I ran into some trouble with what I will call the “Anime Curly Head Woman”. I could not find a good guide online, so as I built the two heads I decided to take some pictures. Hopefully this helps someone out there.I’m not sure why the light level looks so low, I took these directly under a lamp.
There are seven total pieces in the head. One face, one hair mane, and then five curls that you glue into the head and mane. Here is how I did it.
Below is the head sprue. I circled the mane, labeled A. The face is already trimmed, sorry, but it will be fairly obvious which one it is as it has a two-level fit to the mane. I’ve labeled the curls A, B, C, D, and E. Yeah, I messed up and called the mane and a curl both A, but whatever.
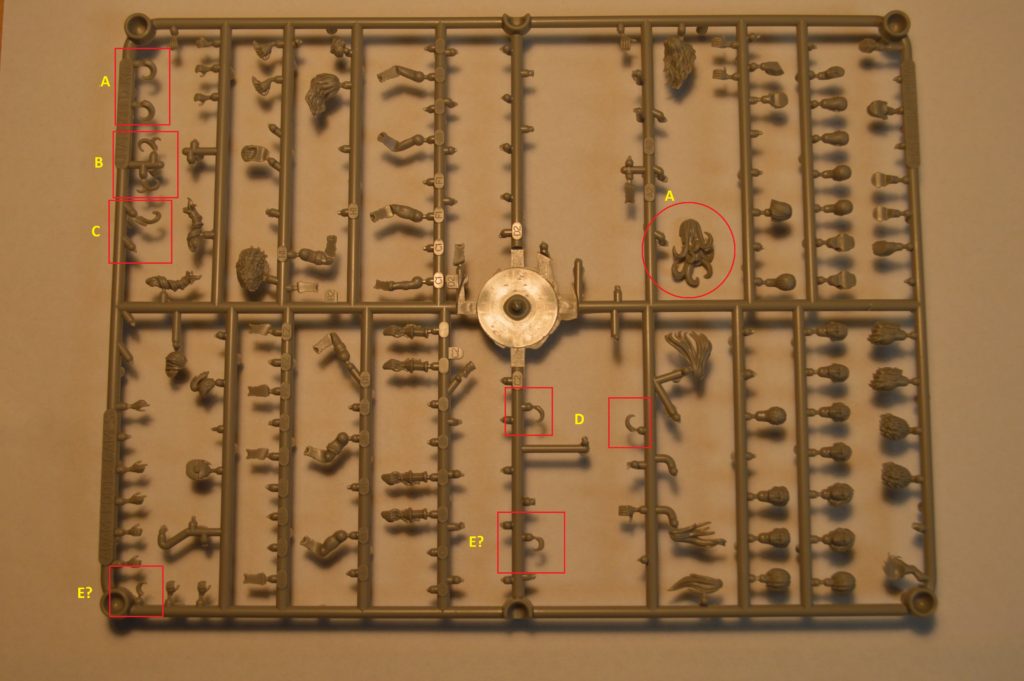
The main sprue. I’ve already removed a lot of items.
You can glue the face to the mane before doing anything else, it really doesn’t matter and may even make the side curls easier. Test fit all of these curls before applying glue. I recommend using plastic cement so you can toy with the pieces, a tweezer and something long and hard (like a model file) to fine tune the fit once you get the piece in.
These things are tiny. Plastic cement will help fitting as it melts the plastic and gives you time, as opposed to superglue type glues which will probably get all over your fingers and equipment while you do this.
Okay, first curl, the one I labeled “C”, attaches at the location below. This is on the inner side of the mane, facing the model’s back.
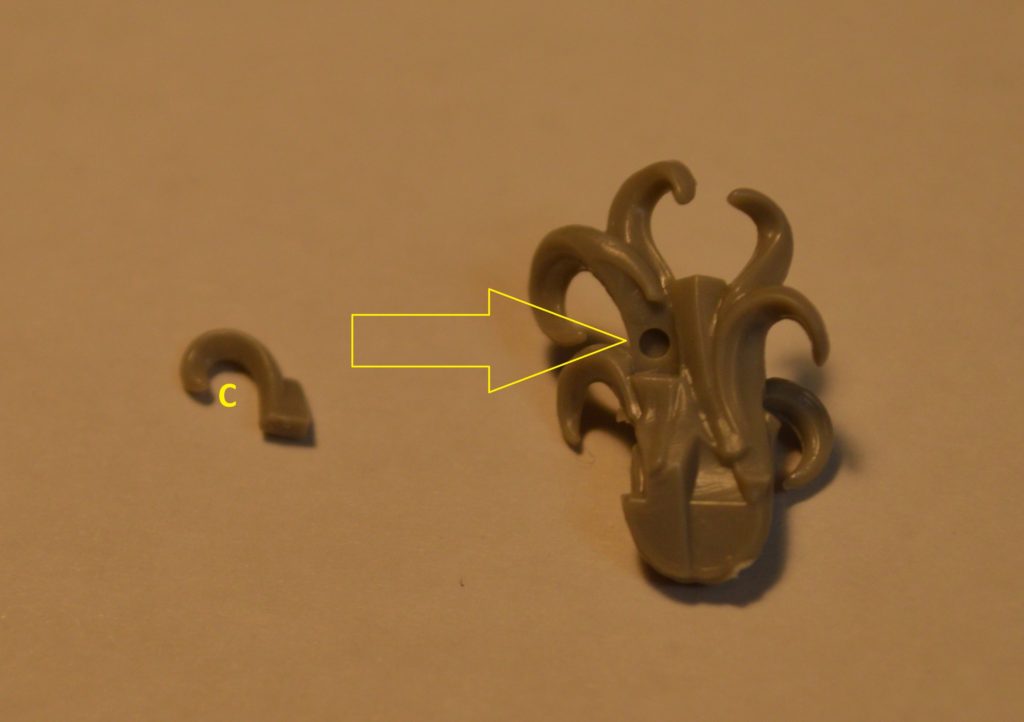
Curl C, Inner back curl.
Next up is “B”, the left side head curl.
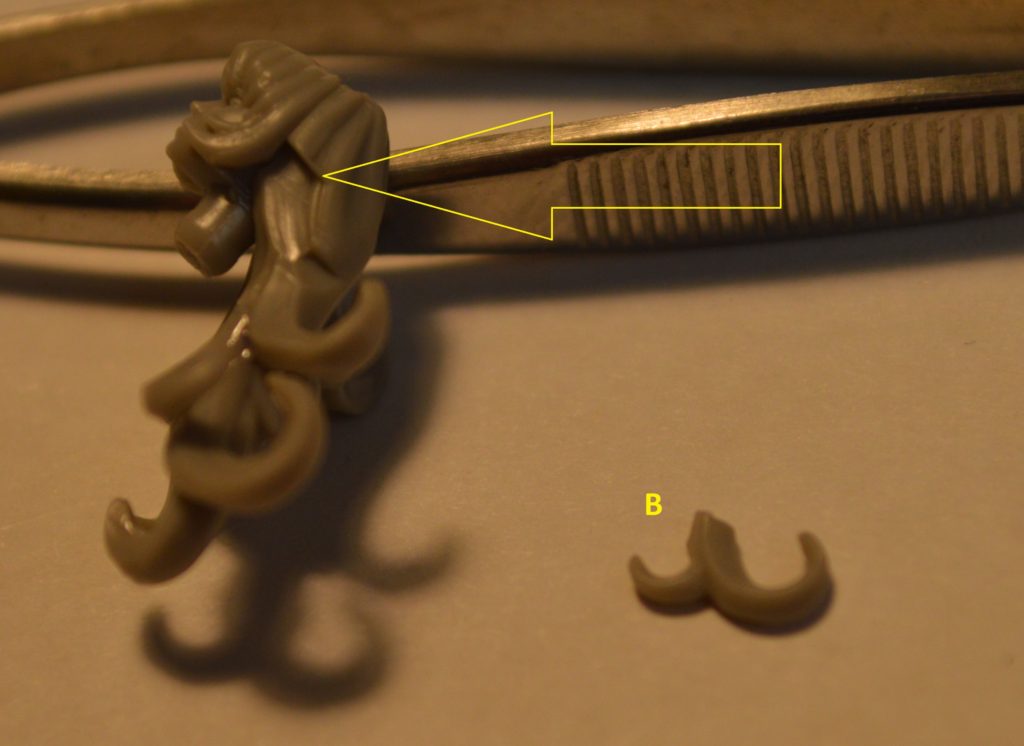
B – Left side head curl
Next up is “A”, which attaches on the bottom of the main, facing out. Piece “C” was “under” the hair, facing the model’s back. This is pretty much on the other side.
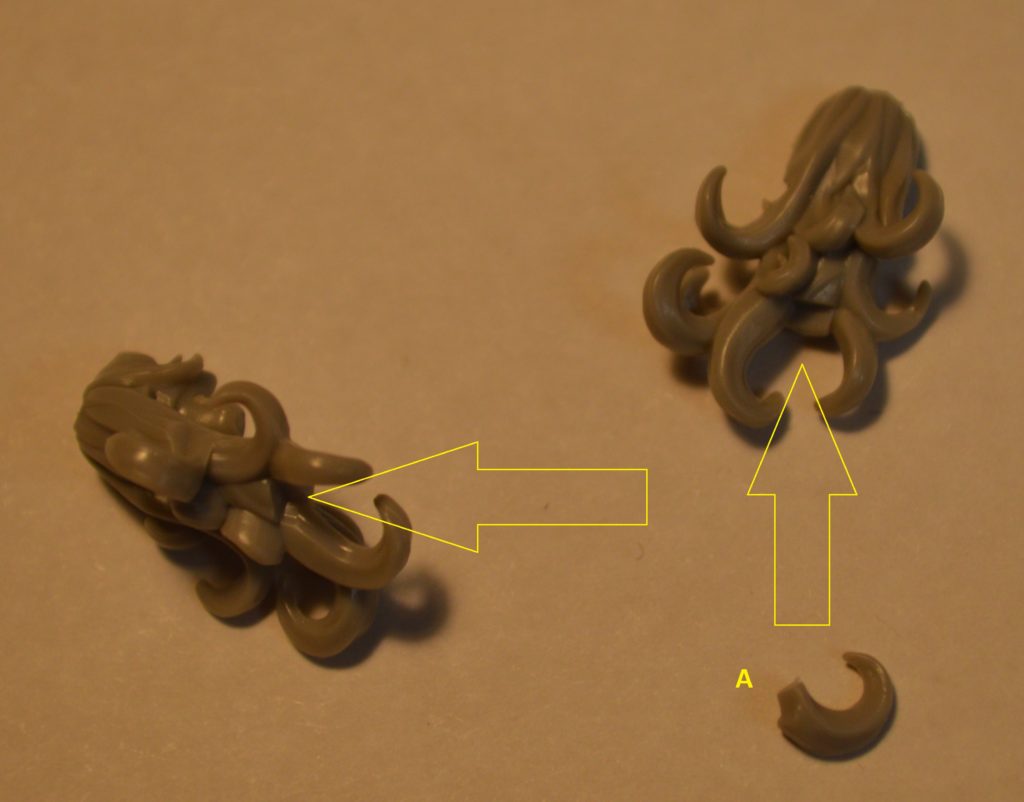
A – Lower out back curl
Moving on to D, the right side head curl.
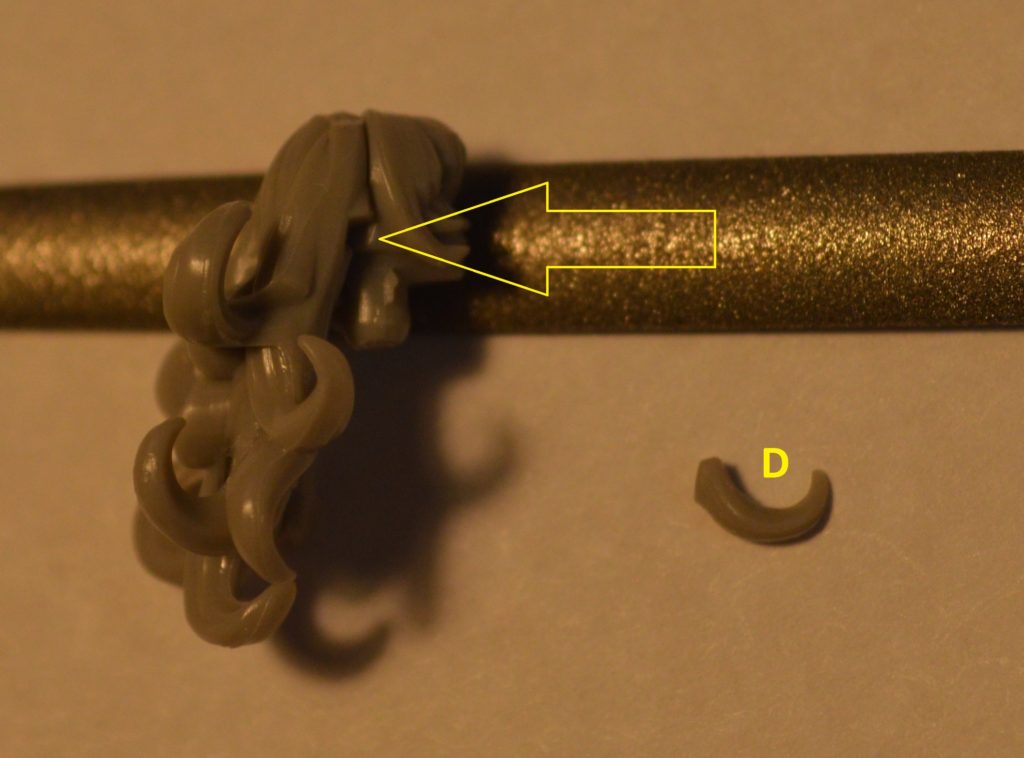
D – Right side head curl
Final curl “E” fits into an indent on the right outer mane. This one is really tricky to see. Test fit it. The orientation below is pretty close.
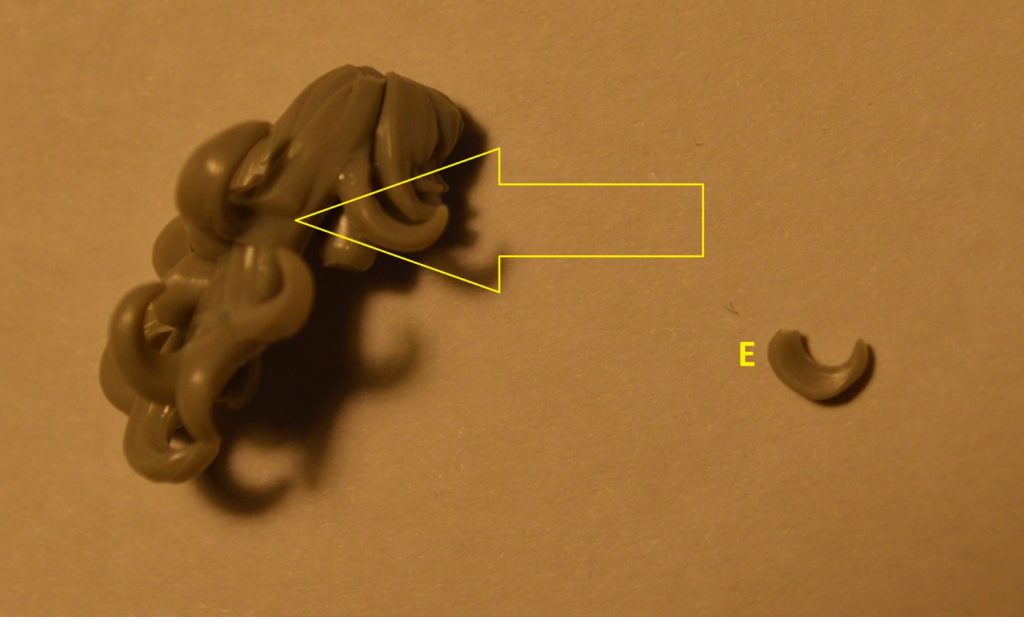
E – Right side mane curl
Finally, a few pictures from multiple angles.
