Not too long ago I got Elite: Dangerous. After a few days of playing the game I realized I wanted to play the game using a HOTAS setup. I quickly ordered a Thrustmaster X-HOTAS to try out the interface. A week later I had some birthday money and a desire to blow cash on trivial things, so I bought a Saitek x55 Rhino HOTAS. It was great, but I realized my desk was not configured to use any HOTAS set up for any length of time. The problem is that a conventional desk is built for the height of keyboard and mouse, not the height of a throttle and joystick. Using a HOTAS with your arms at 45’ angle is just asking for neck, shoulder, and back pain. After looking at how much various flight and racing sim seats cost, and other peoples’ approaches to custom cockpits, I decided to make my own custom HOTAS chair.
Choosing a Throne
A quick search of the internets showed that most home-brew HOTAS chairs use one of three approaches: Clamps or brackets on armrests, clamps on desks, or a PVC “super-structure” to which a HOTAS is mounted and then you slide it under your desk or chair. Because I am a glutton for punishment, I decided none of these were what I wanted to use, and more importantly, might not pass muster with my wife.
I decided to try an approach largely absent from my searches: mounting a support strut under my office chair, attaching bespoke platforms to the strut, and mounting the HOTAS units to the platforms. The ability to remove the setup from the chair relatively quickly and the ability to adjust the HOTAS after mounting were secondary goals.
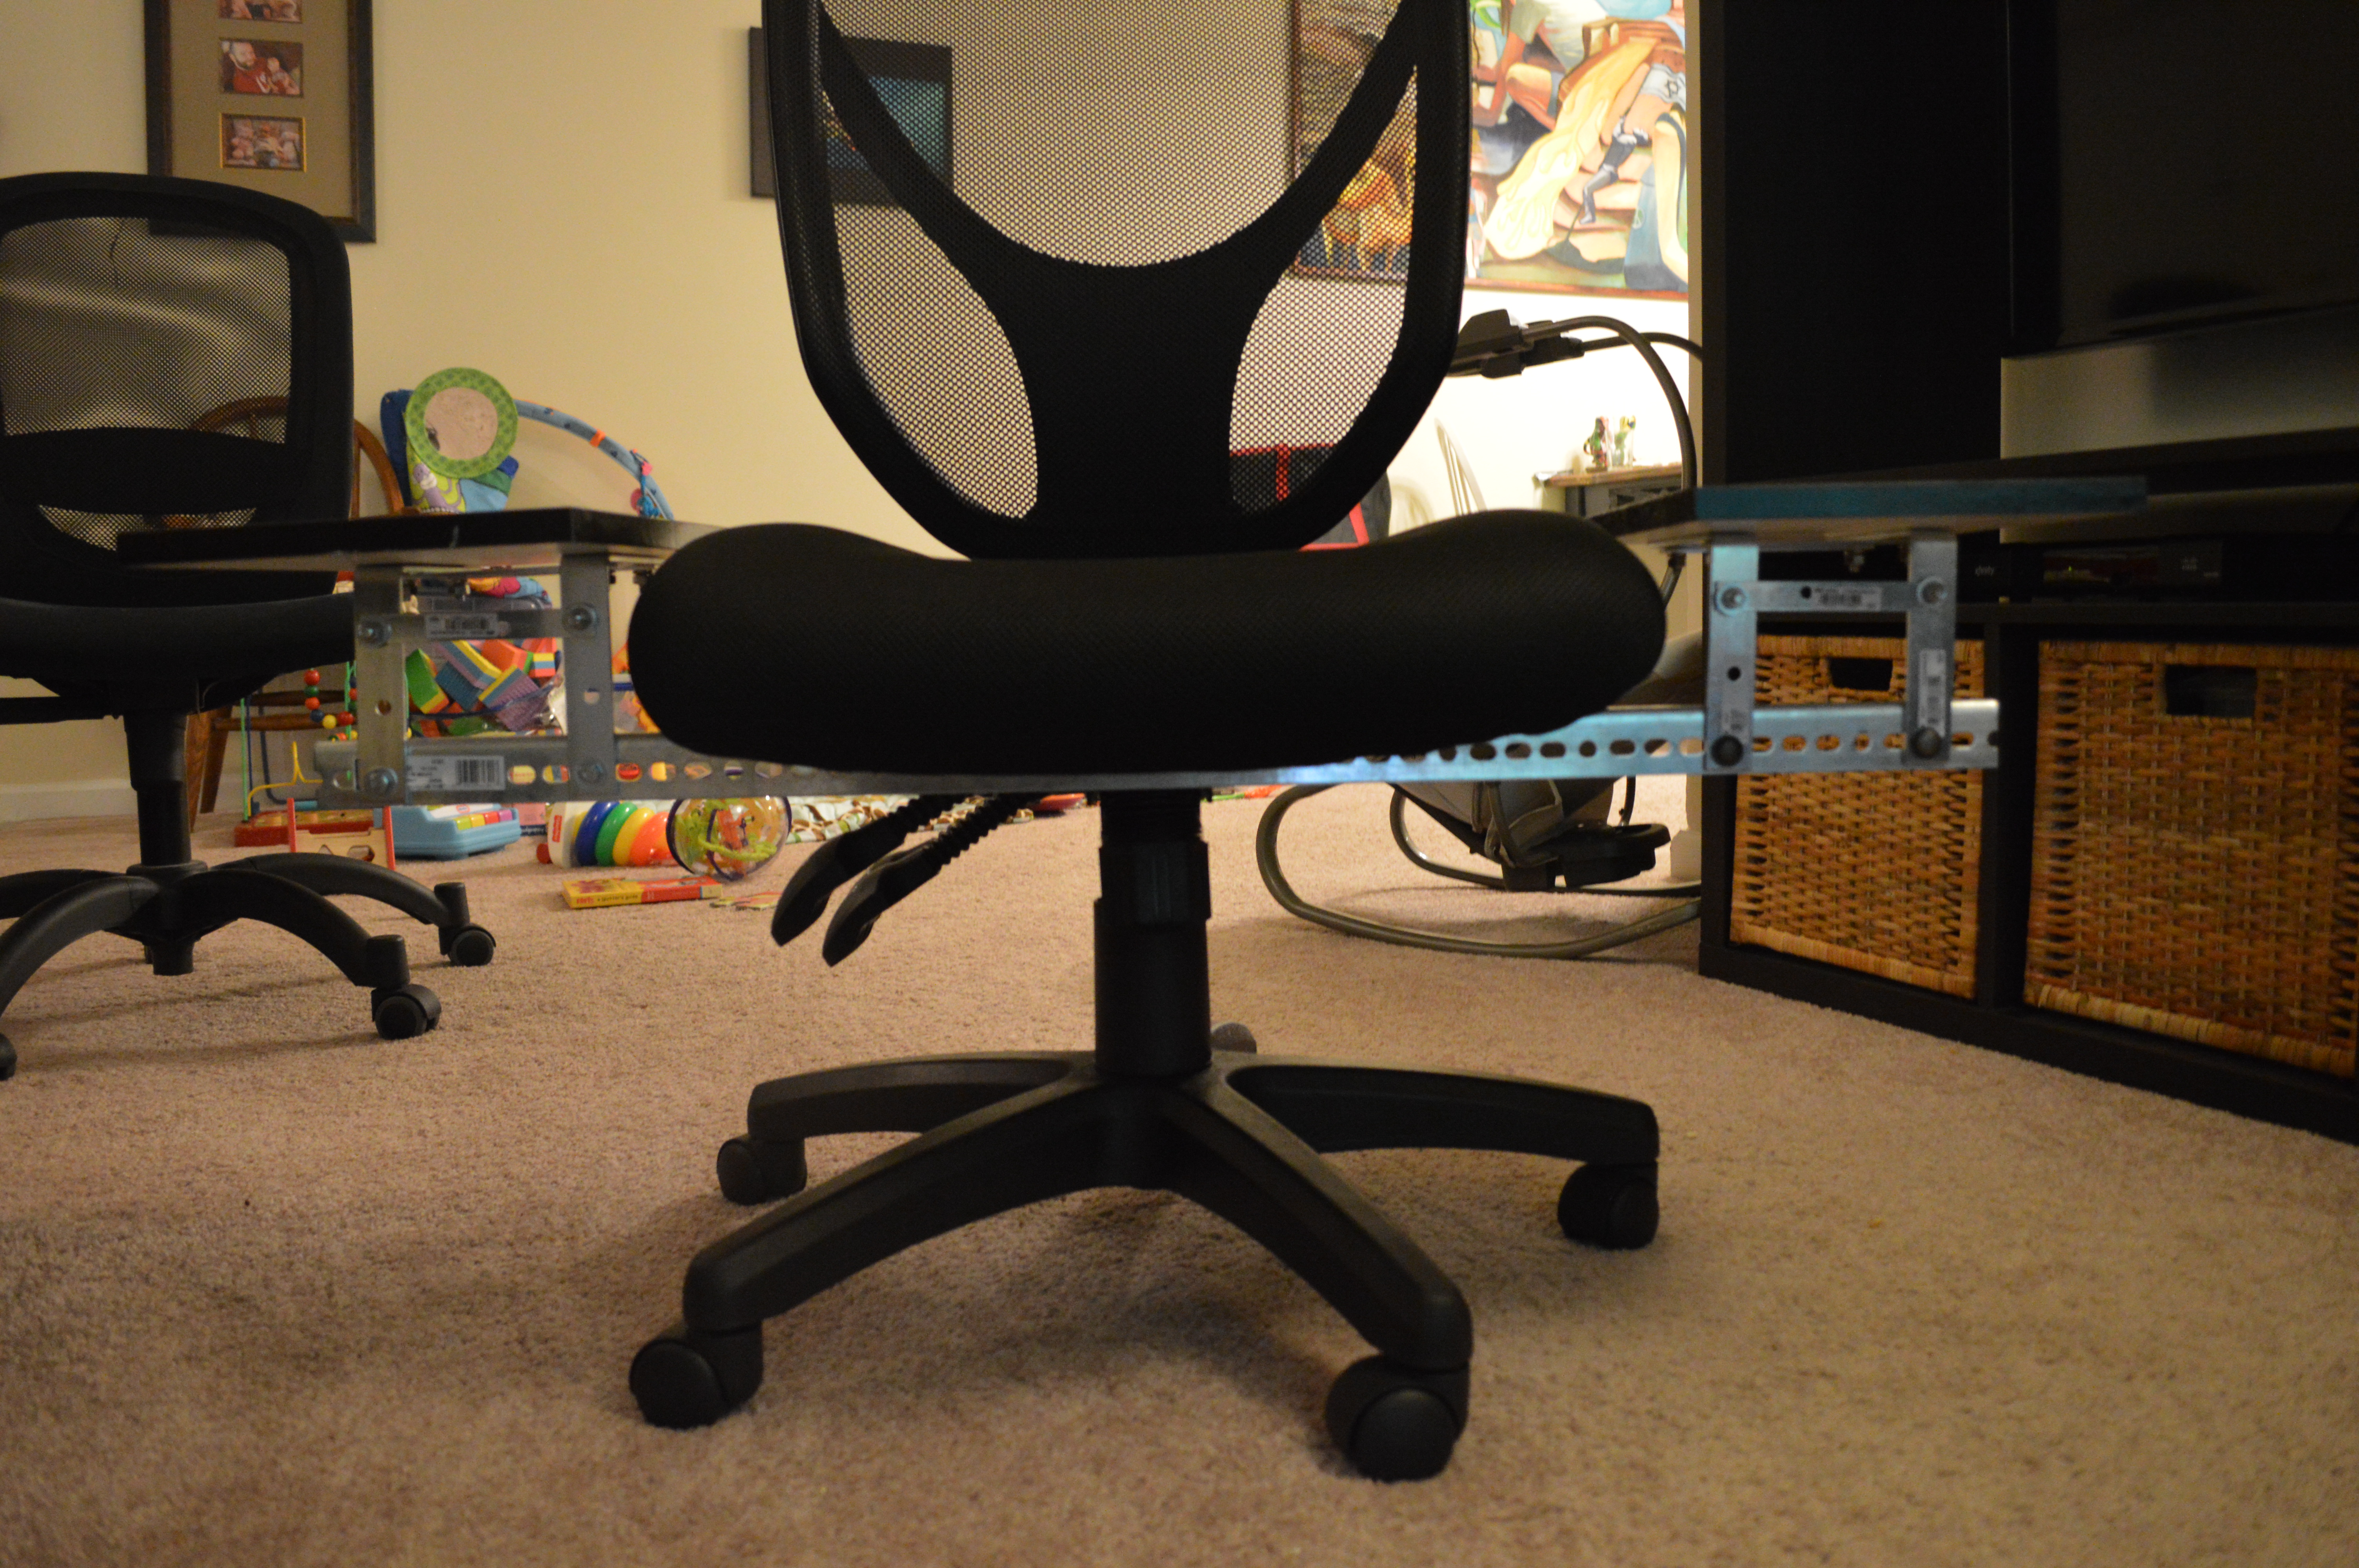
I already knew I needed a new office chair. I am picky about chairs, and now I found that I had to also pick a chair which would be able to mount supports for “floating” HOTAS equipment. A trip to Office Depot led me to a rather cheap ergonomic office chair with detachable armrests and extra holes on the chair’s lower mounting surfaces where the ergo controls attach to the seat. This meant I could effectively design around an adjustable chair and mount the strut without actually damaging the chair in the process. Yippee! First purchase complete, about $100.
Version 1.0
With chair in tow, and the seat mount removed from the box, I went to my local ACE Hardware. I go to ACE when I can because they tend to have the best stock of hardware and fasteners, and people who often know a bit about the items as compared to my misadventures at Home Depot and Lowes. Also, returns at ACE are pretty simple, and I figured returns were going to be a part of this project. Disclaimer: I have worked at ACE as an employee, so I may be biased. Once there, off to the hardware section!
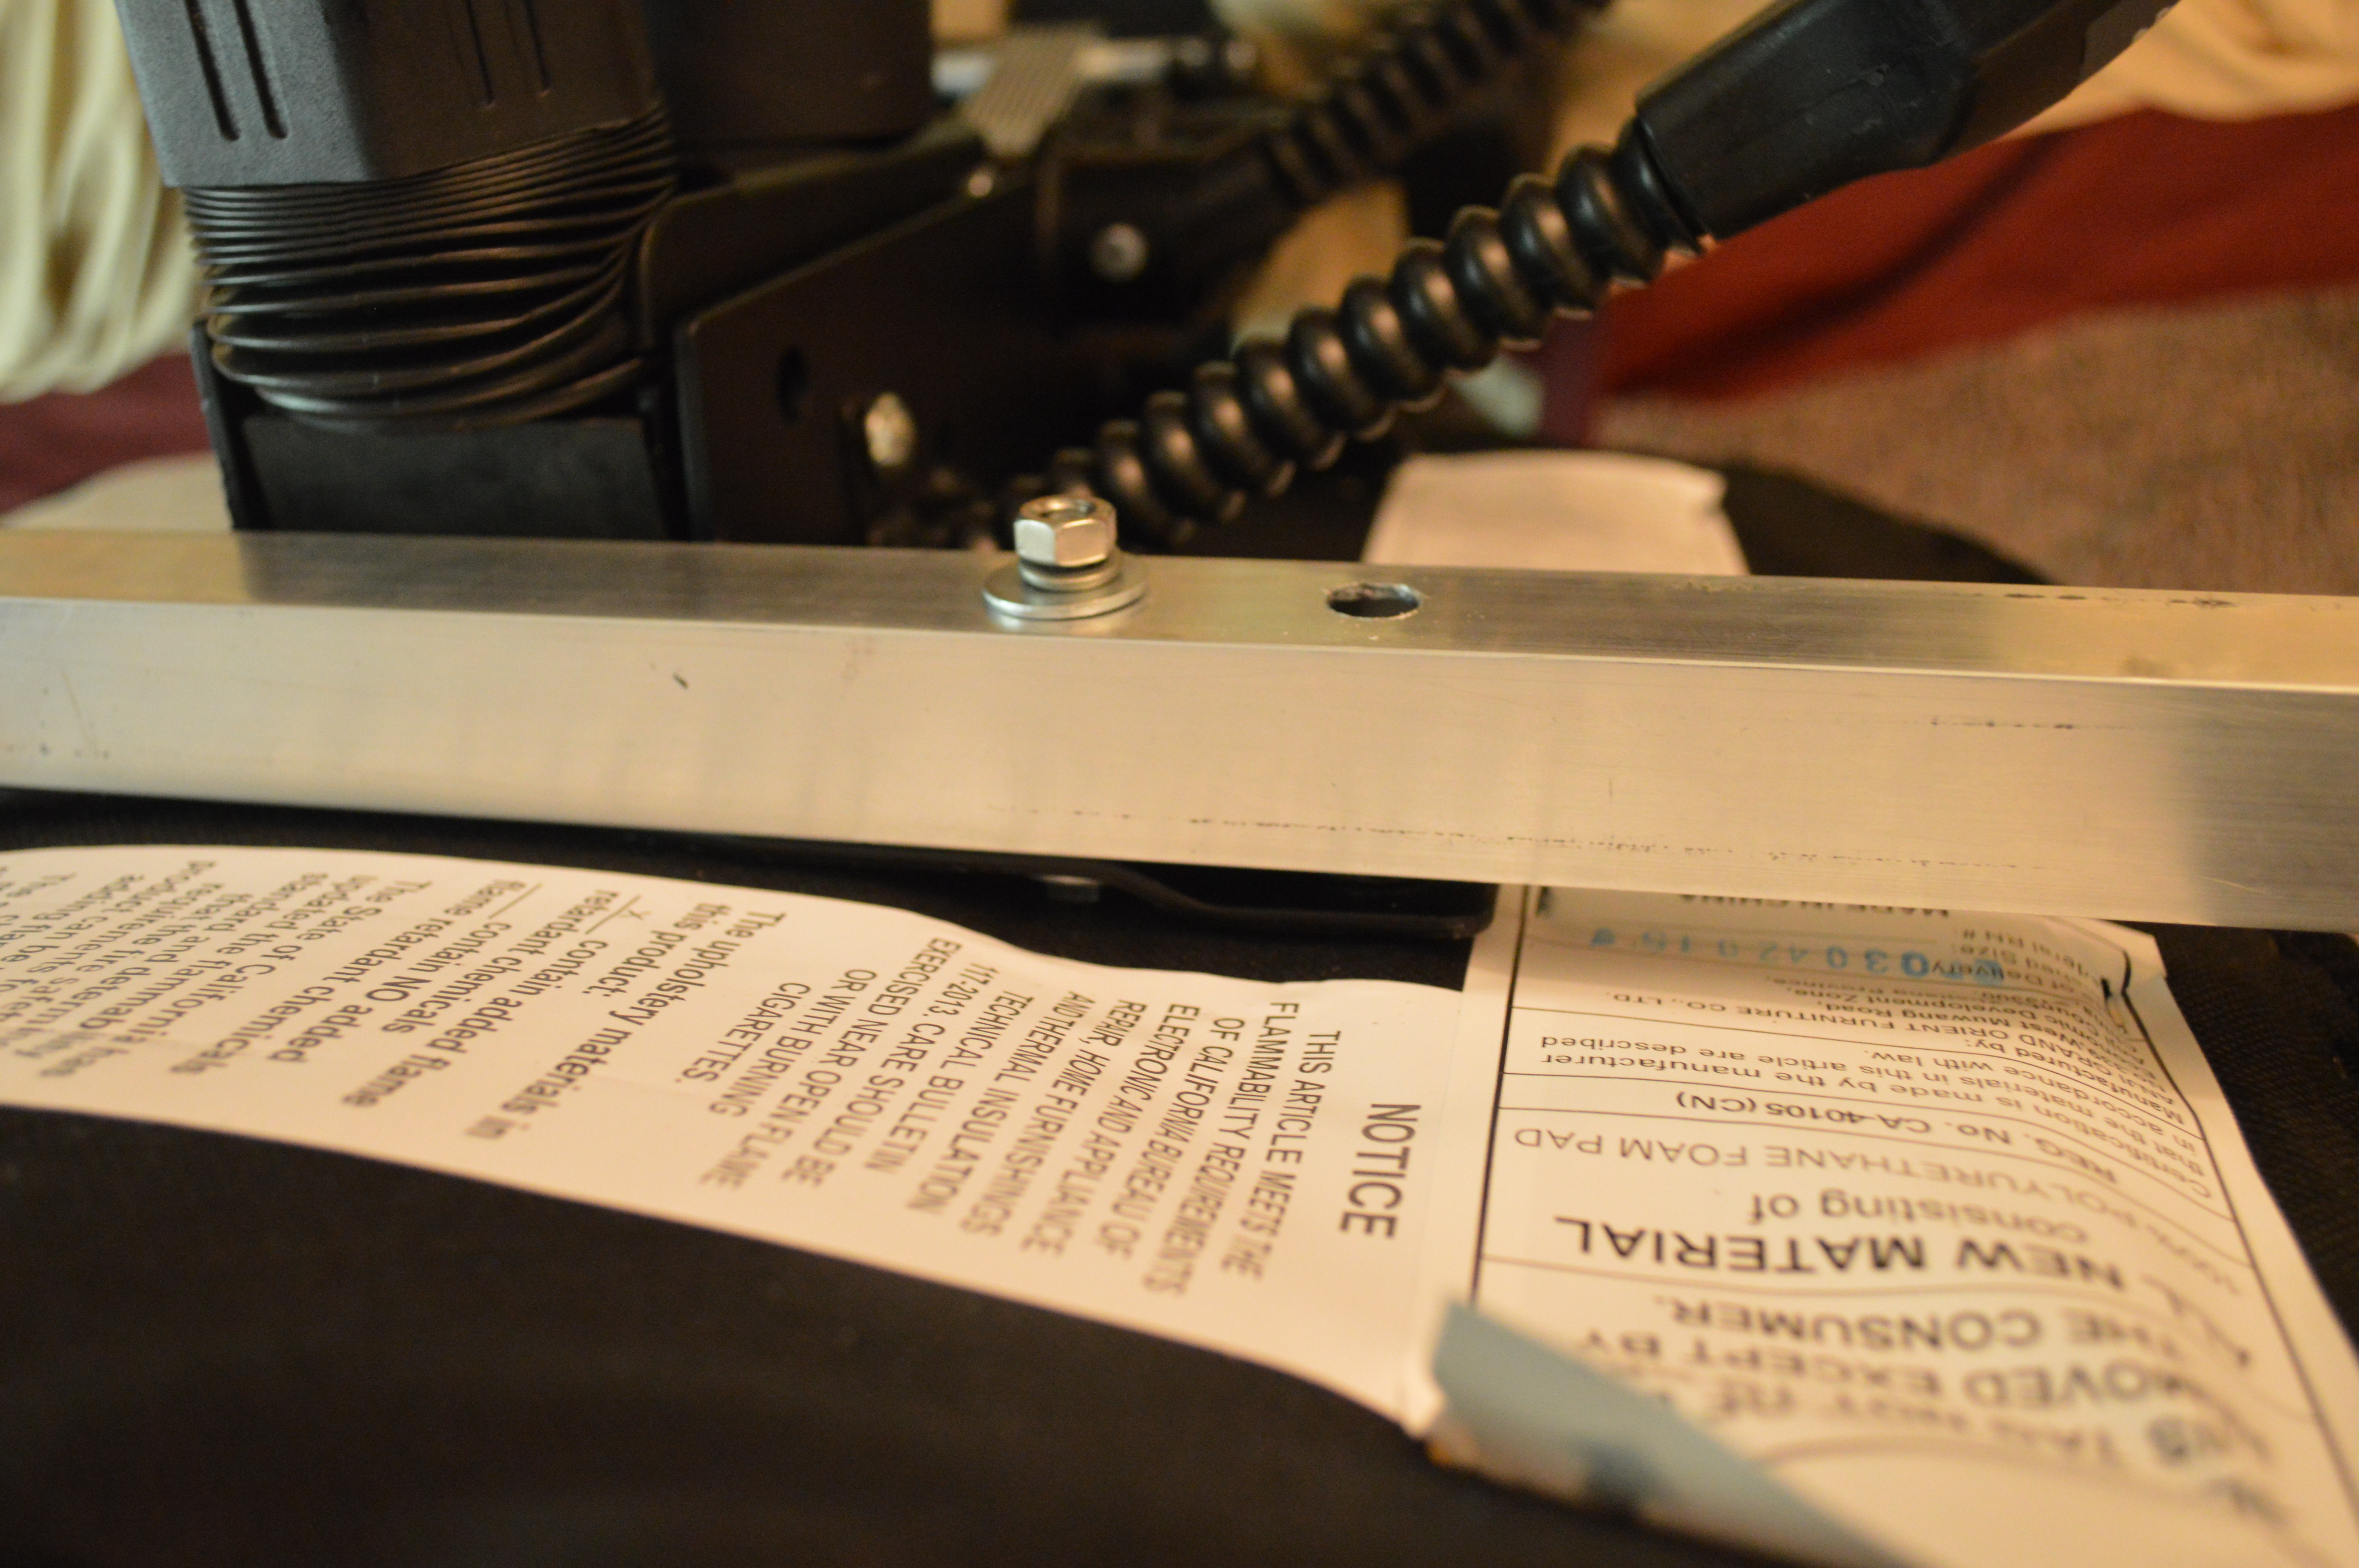
My initial build used a 36” steel strut with a 90’ angle, a kind of a giant length-wise corner bracket, as the crossbeam. I also purchased 4 4” steel corner braces, a cheap MDF shelf, and sundry nuts, bolts, lock washers, ect. I took everything home and started building.
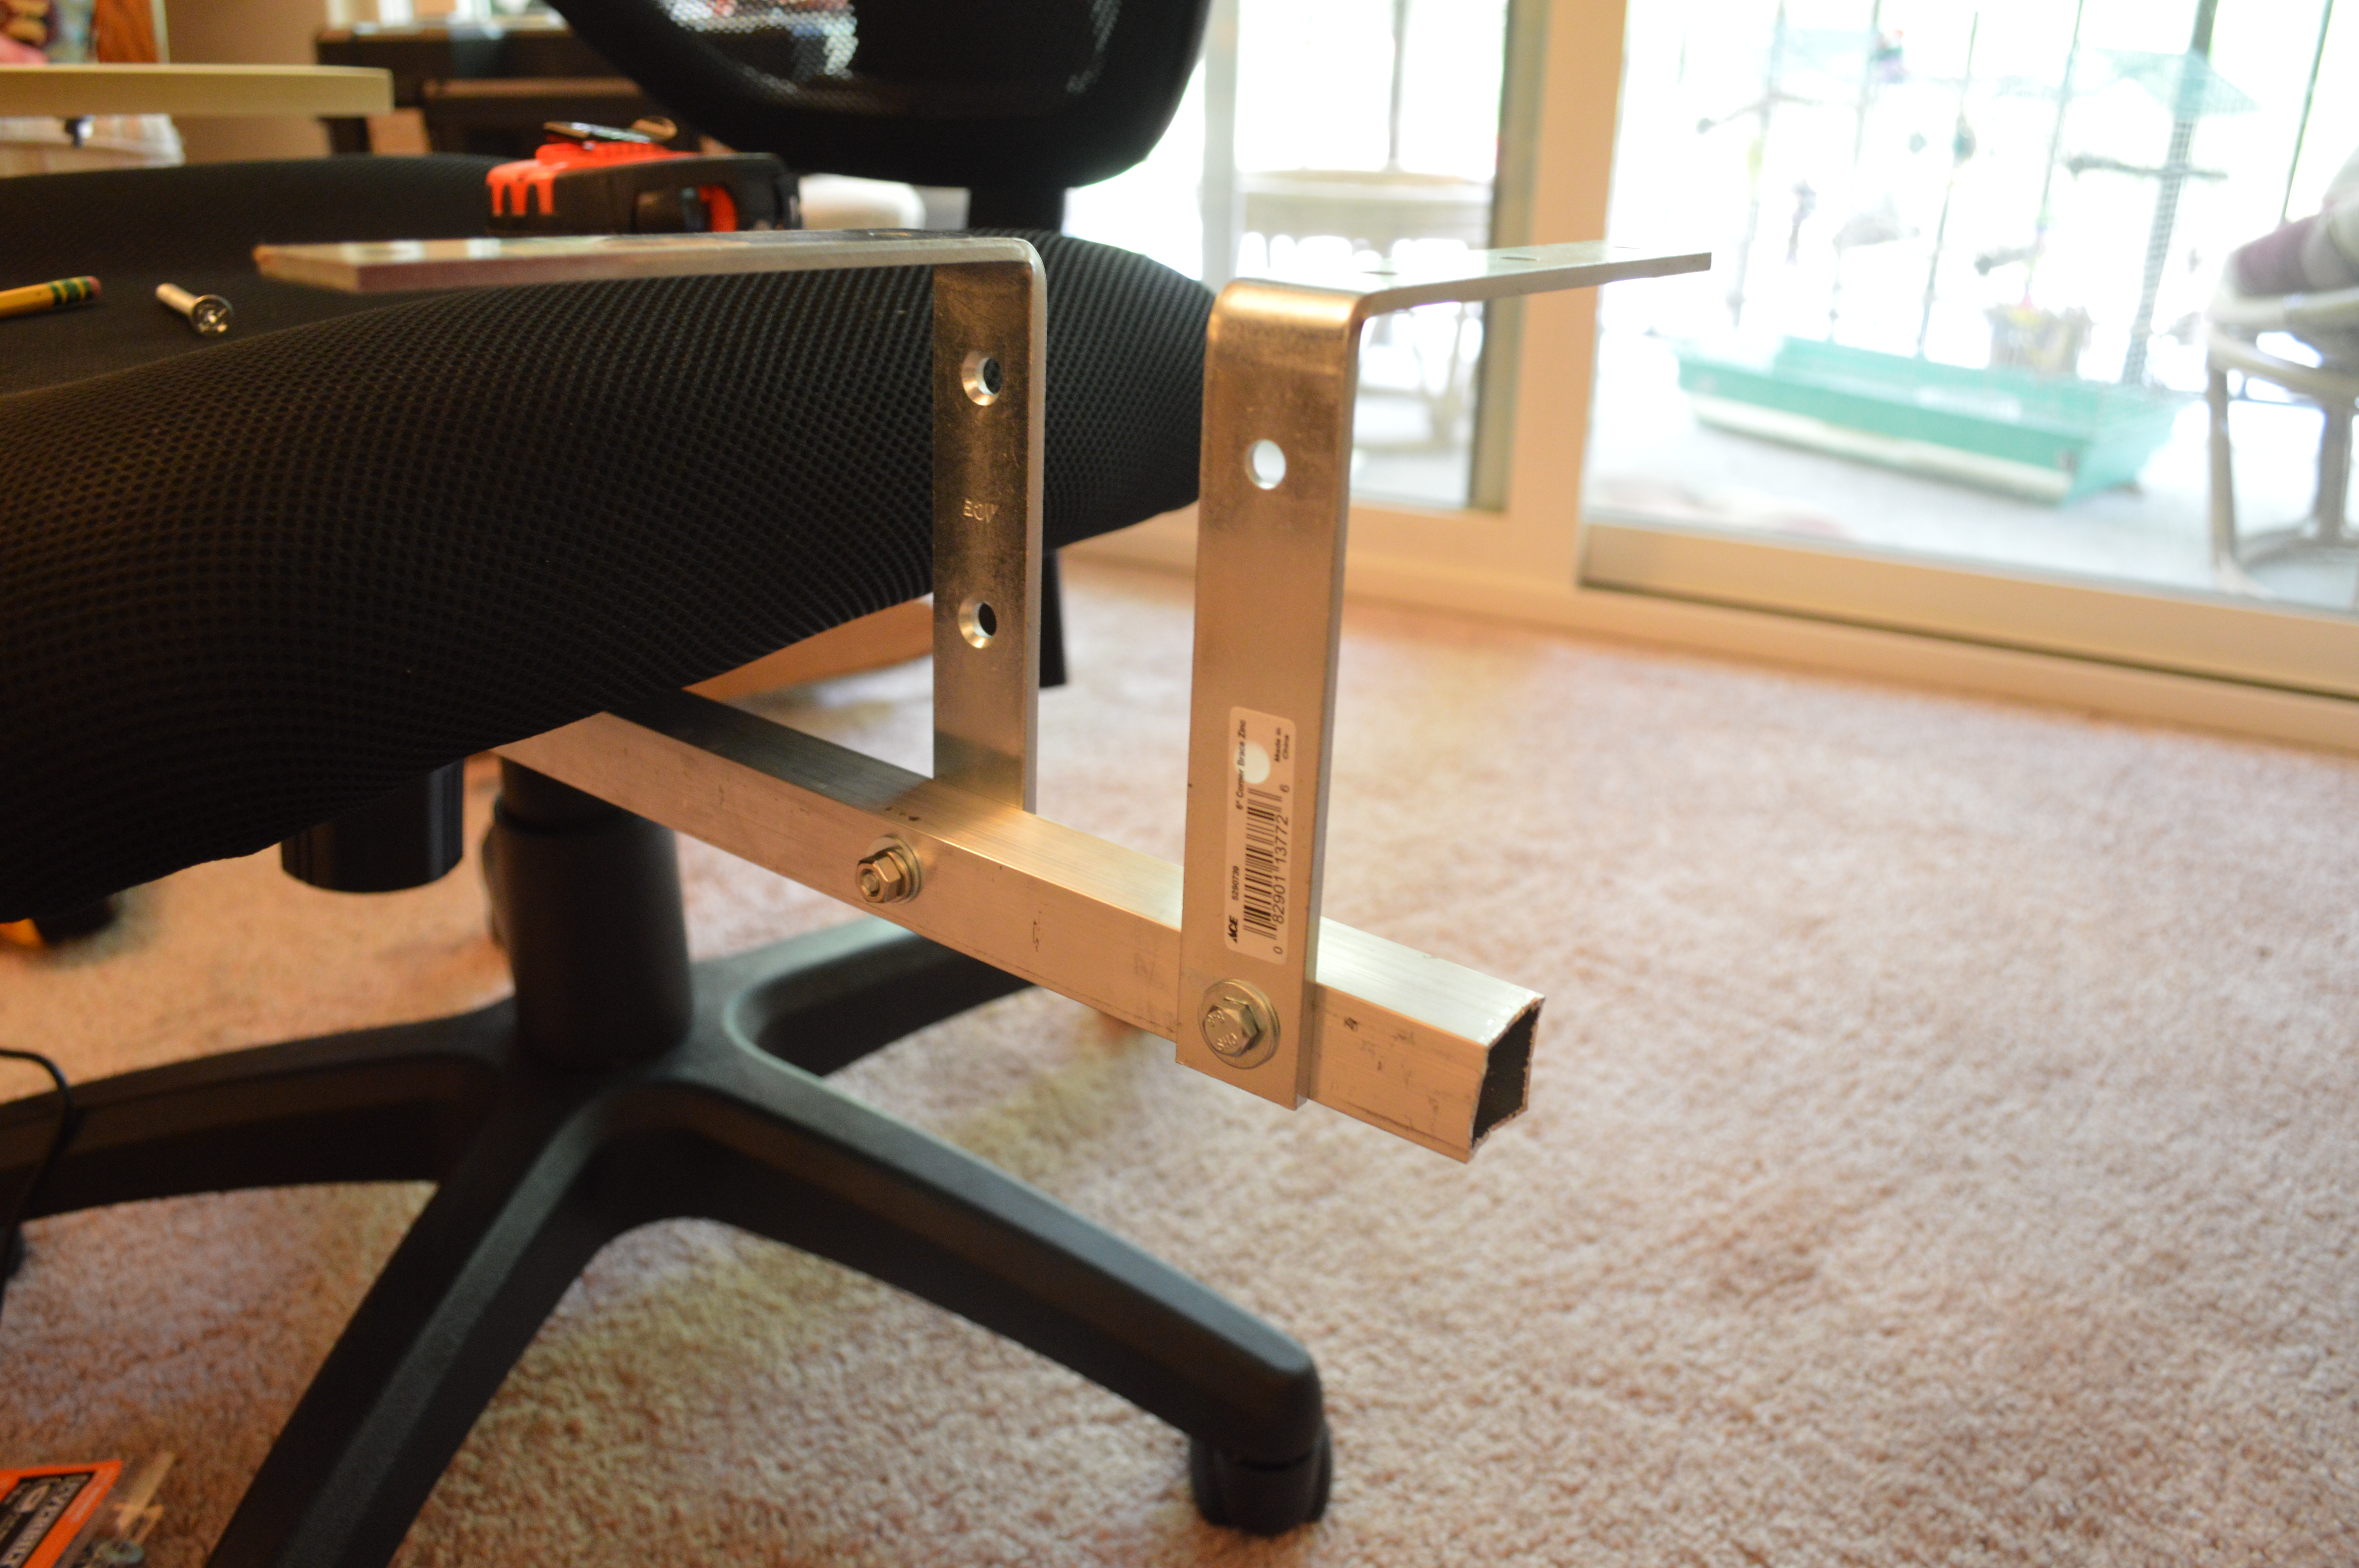
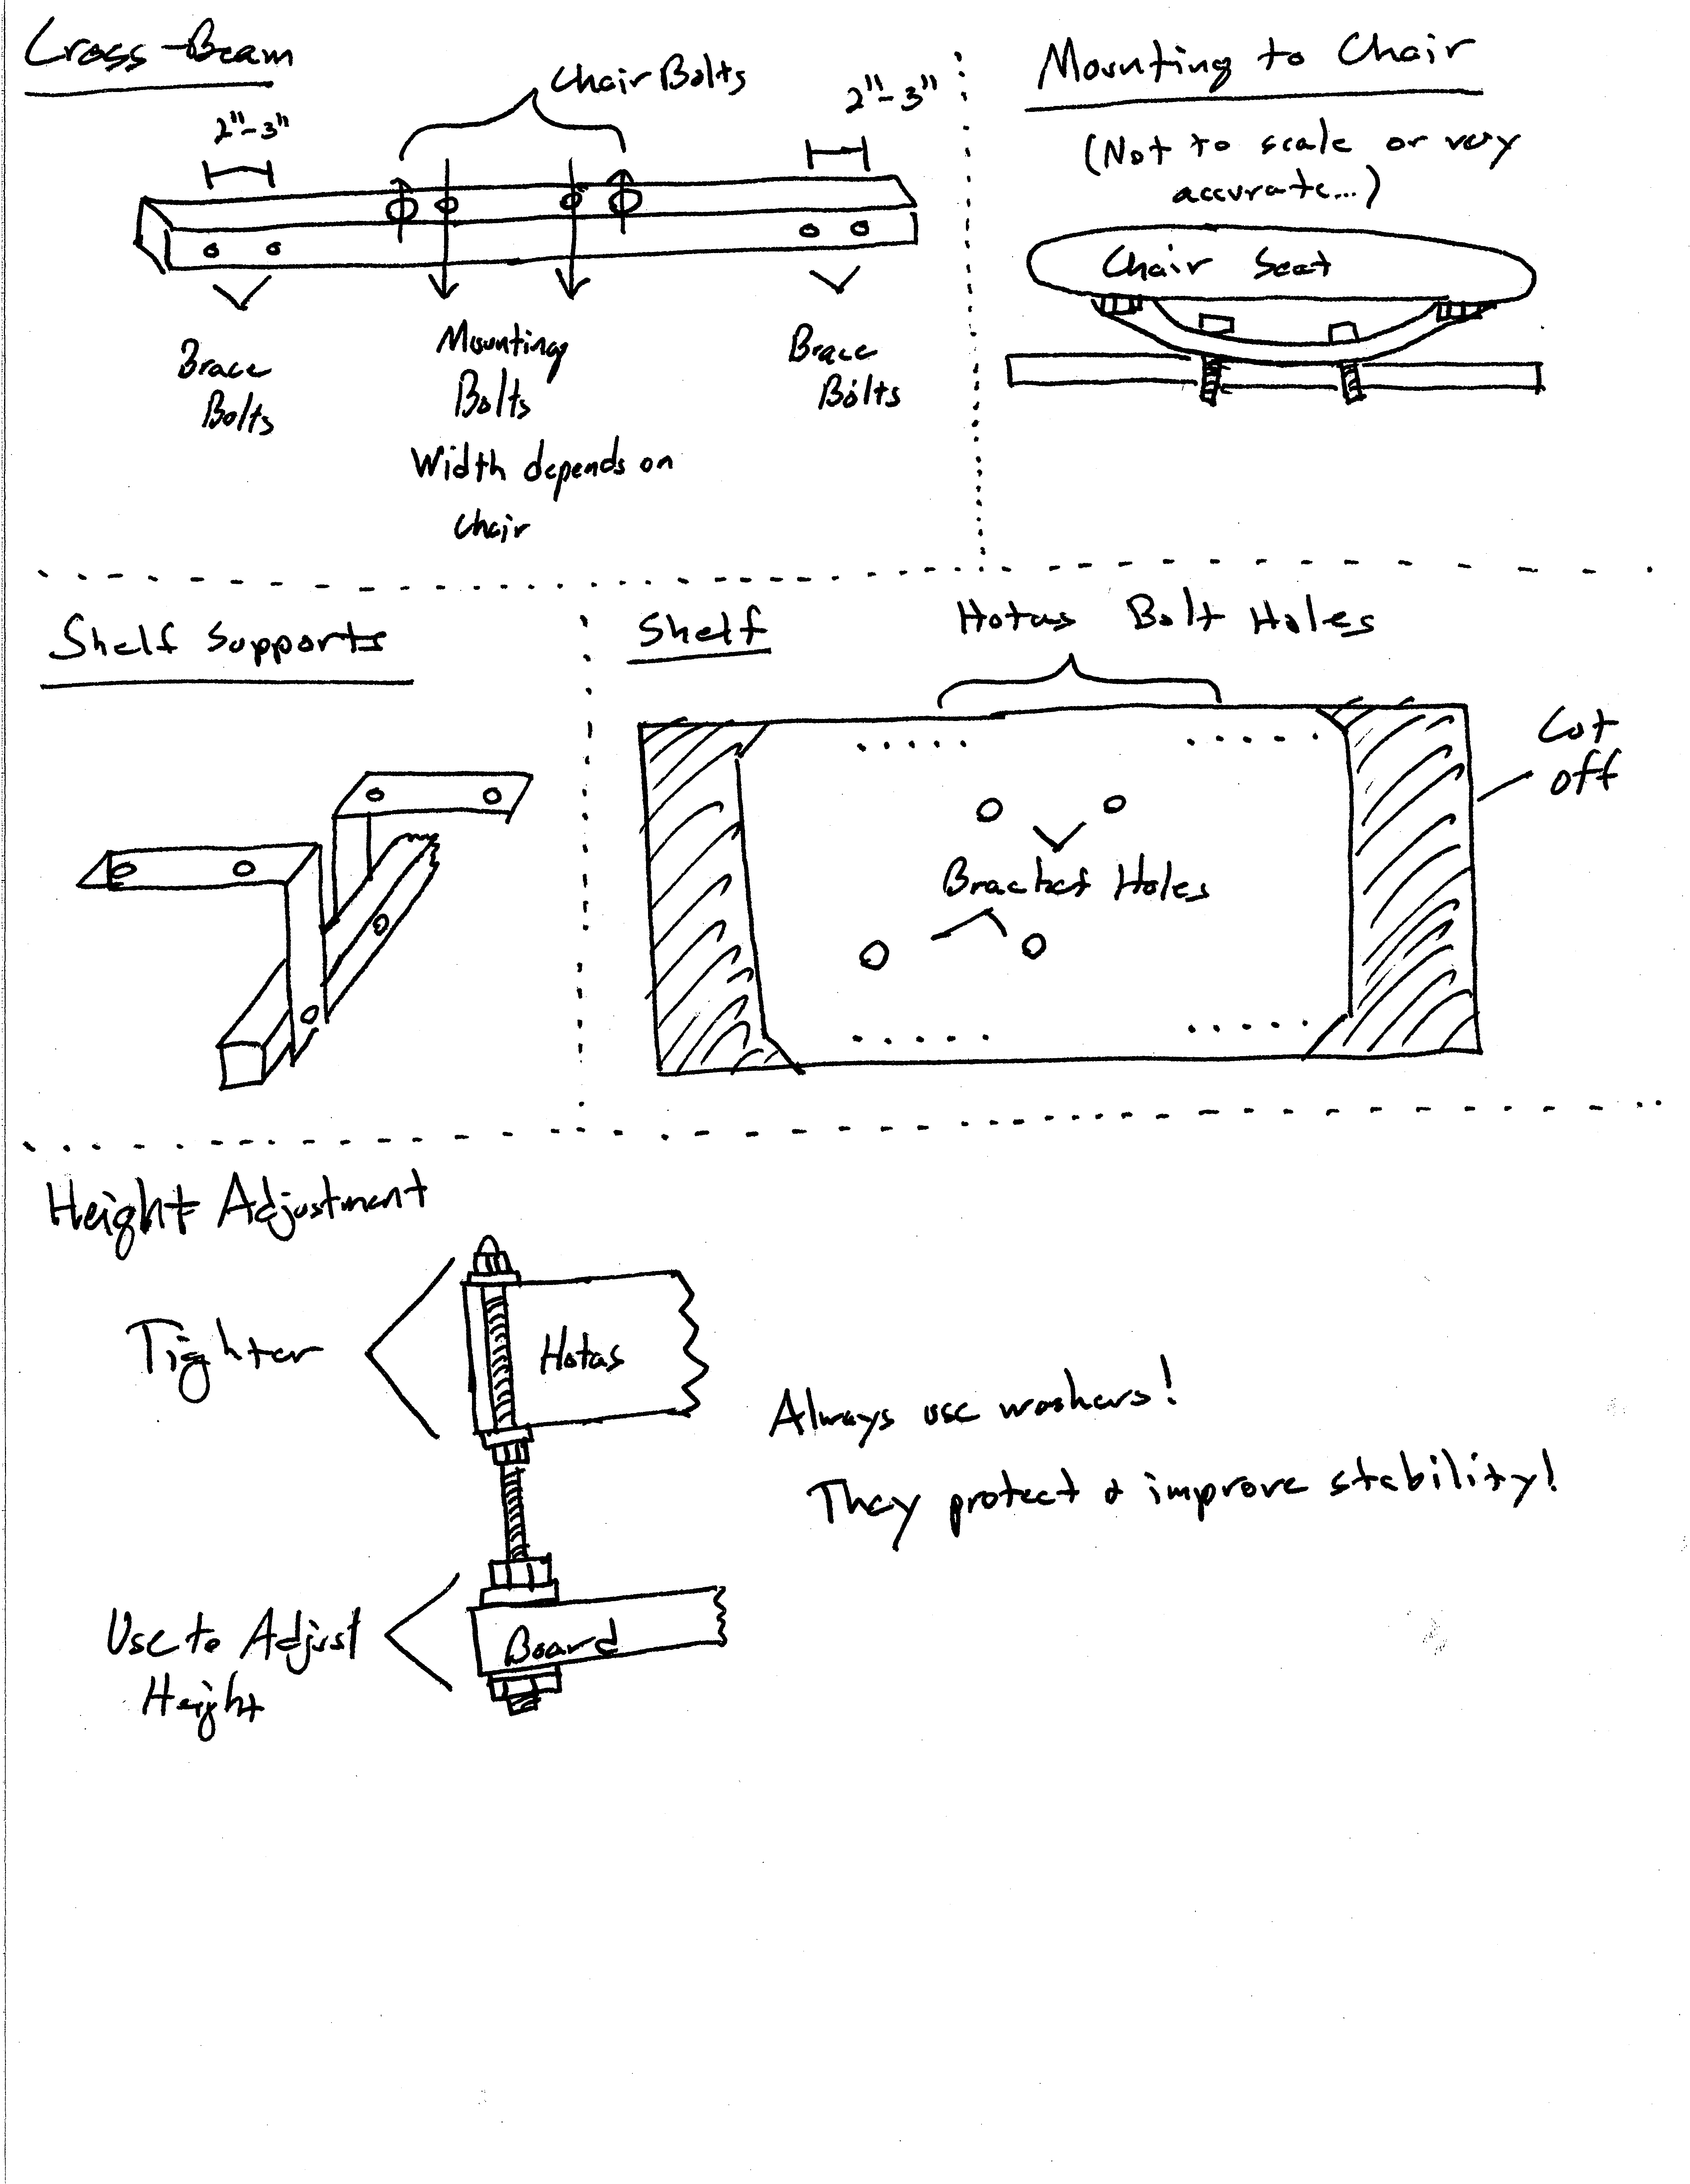
To attach the cross member I had to insert the mounting bolts into the chair mount facing down, then mount the chair mount to the chair seat. I was trapping the mounting bolts for the strut between the chair seat and mount. I used a pair of nuts to fill in the space and give the mounting bolts for the cross bar some tightness and friction, as getting in there to tighten them would be difficult, as the cleareance was negligible. Once I go the seat attached to the seat base I measured and bolted on the cross beam, then placed two 90’ brackets on each end, both facing forward to give support in the direction of pressure when engaging the throttle and stick. After that I cut the shelf I bought it half, test fitted the shelf against the brackets, and drilled the bolt holes in the shelf that would secure it to the 90’ brackets.
Everything fit well after loose fitting, so I grabbed my HOTAS unit, placed it on the shelf, and dropped a bolt into the mounting hole and tapped it at each location to give an indent on the shelf. I then drilled mounting holes into the shelf at the indents, and bolted everything together: Shelves to brackets, HOTAS to shelves, and tightened the whole thing down, using lock washers and lock washers at all points to distribute load and keep nuts from loosening.
A Problem of Rotation
The set-up worked… kind of. I had expected a little bit of play off the brackets when pushing or pulling on the throttle or stick, but I was getting a lot of rotation. I spent a night or two messing about with the system, adding cross braces here, mentally testing a nylon suspension system there, and then I realized the problem was not the brackets, it was the crossbeam. While a 36” steel corner brace is very inflexible along the major axes, it can rotate around the axis that happened to be my “pitch”. Un-mounting it showed that I could rotate it with my hand about a quarter of an inch. Add about 18” of length via brackets and the HOTAS, and you have a noticeable problem of rotation.
I also found that the shelving I bought (the cheapest white MDF crap I could find) did not hold spray paint well. I knew I was going to sacrifice at least one set of shelves to the project, so I decided to toss those white shelves and go with raw wood for the next iteration.
Version 2: Aluminum
Back to the hardware store, I traded in the 36” steel for a 36” aluminum square tube. I cannot rotate that by hand. I also picked up a metal drill bit. I took the new crossbeam home, and marked out the location of the mounting bolts and drilled away. I also sawed off a few extra inches of strut, as on a rotating office chair, as nice sharp point at toddler level is a hazard. My first test fitting ran into an issue. Most office chairs have a weird knob in front under the seat. On my chair this meant it was not possible to get the strut onto bolts after mounting due to clearance issues. I had to remove the chair so I could mount the new beam and then reattach the chair seat. This lead to another problem: Without holes evenly spaced as on the steel bracket, the tube covered the mounting screws of the chair seat. I detached the cross bar, drilled two more holes for an allen wrench to fit through so I could tighten the seat to the mounting base, remounted the bar, and I could reassemble the chair!
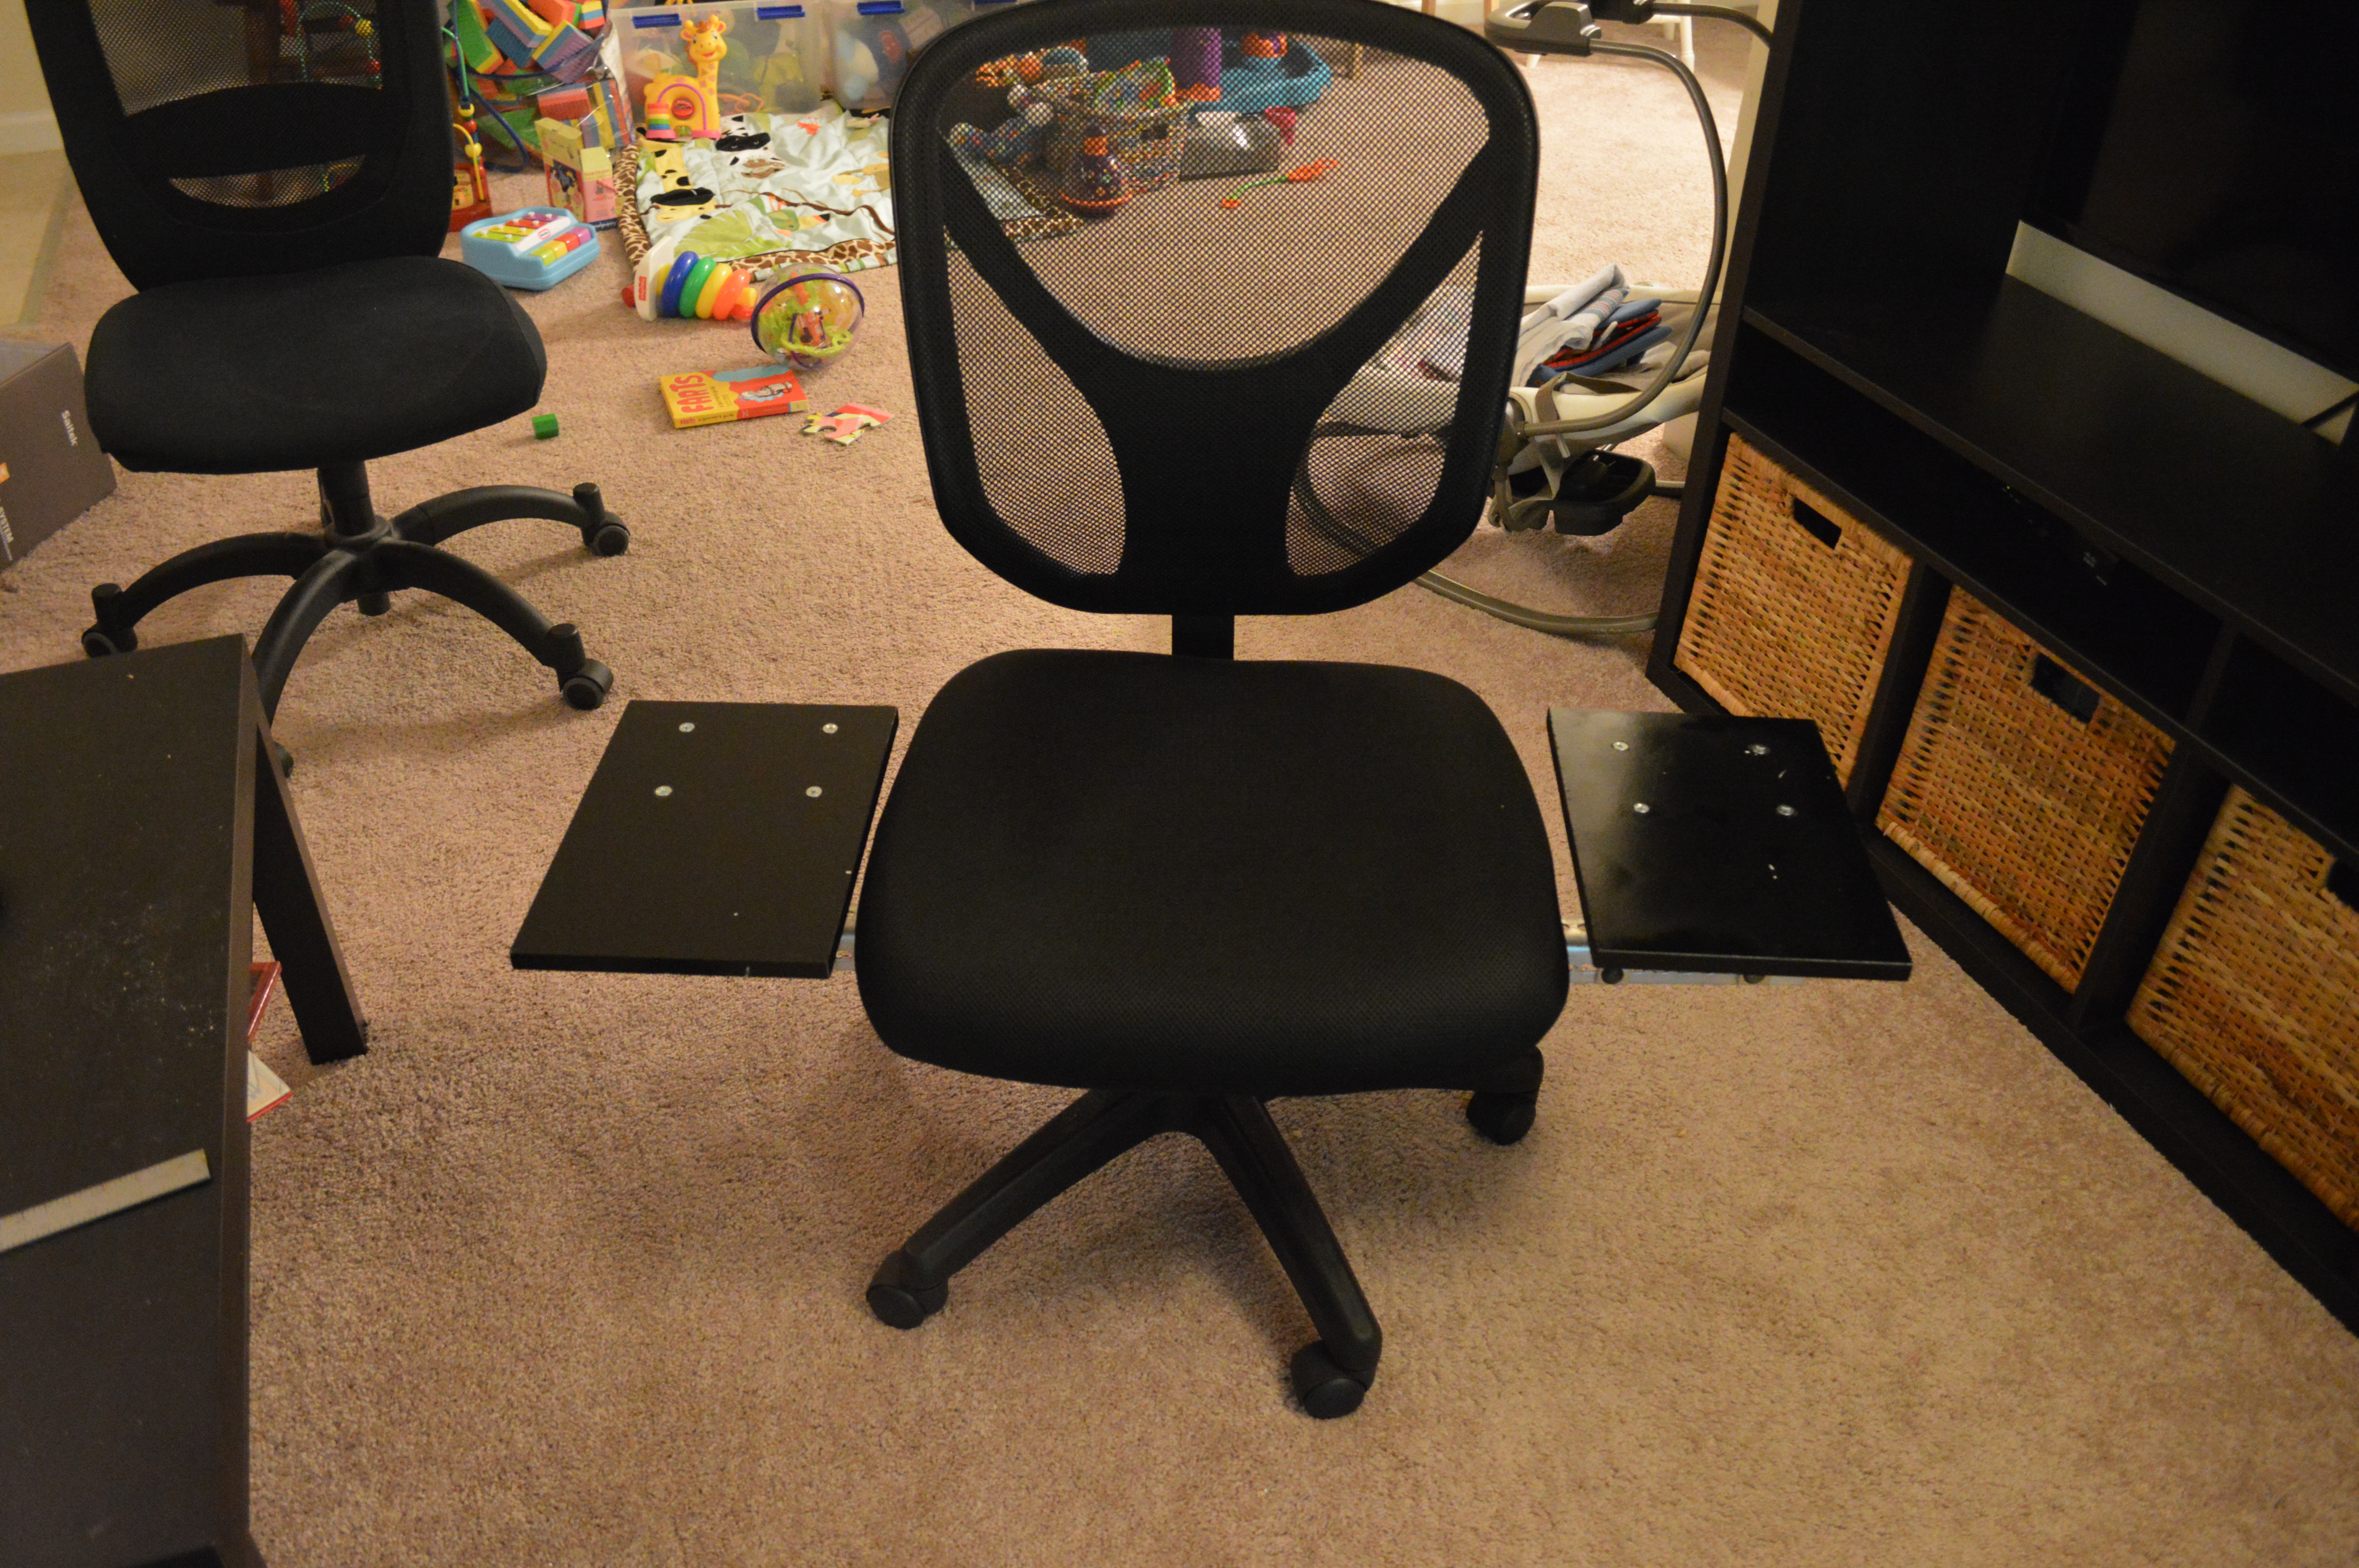
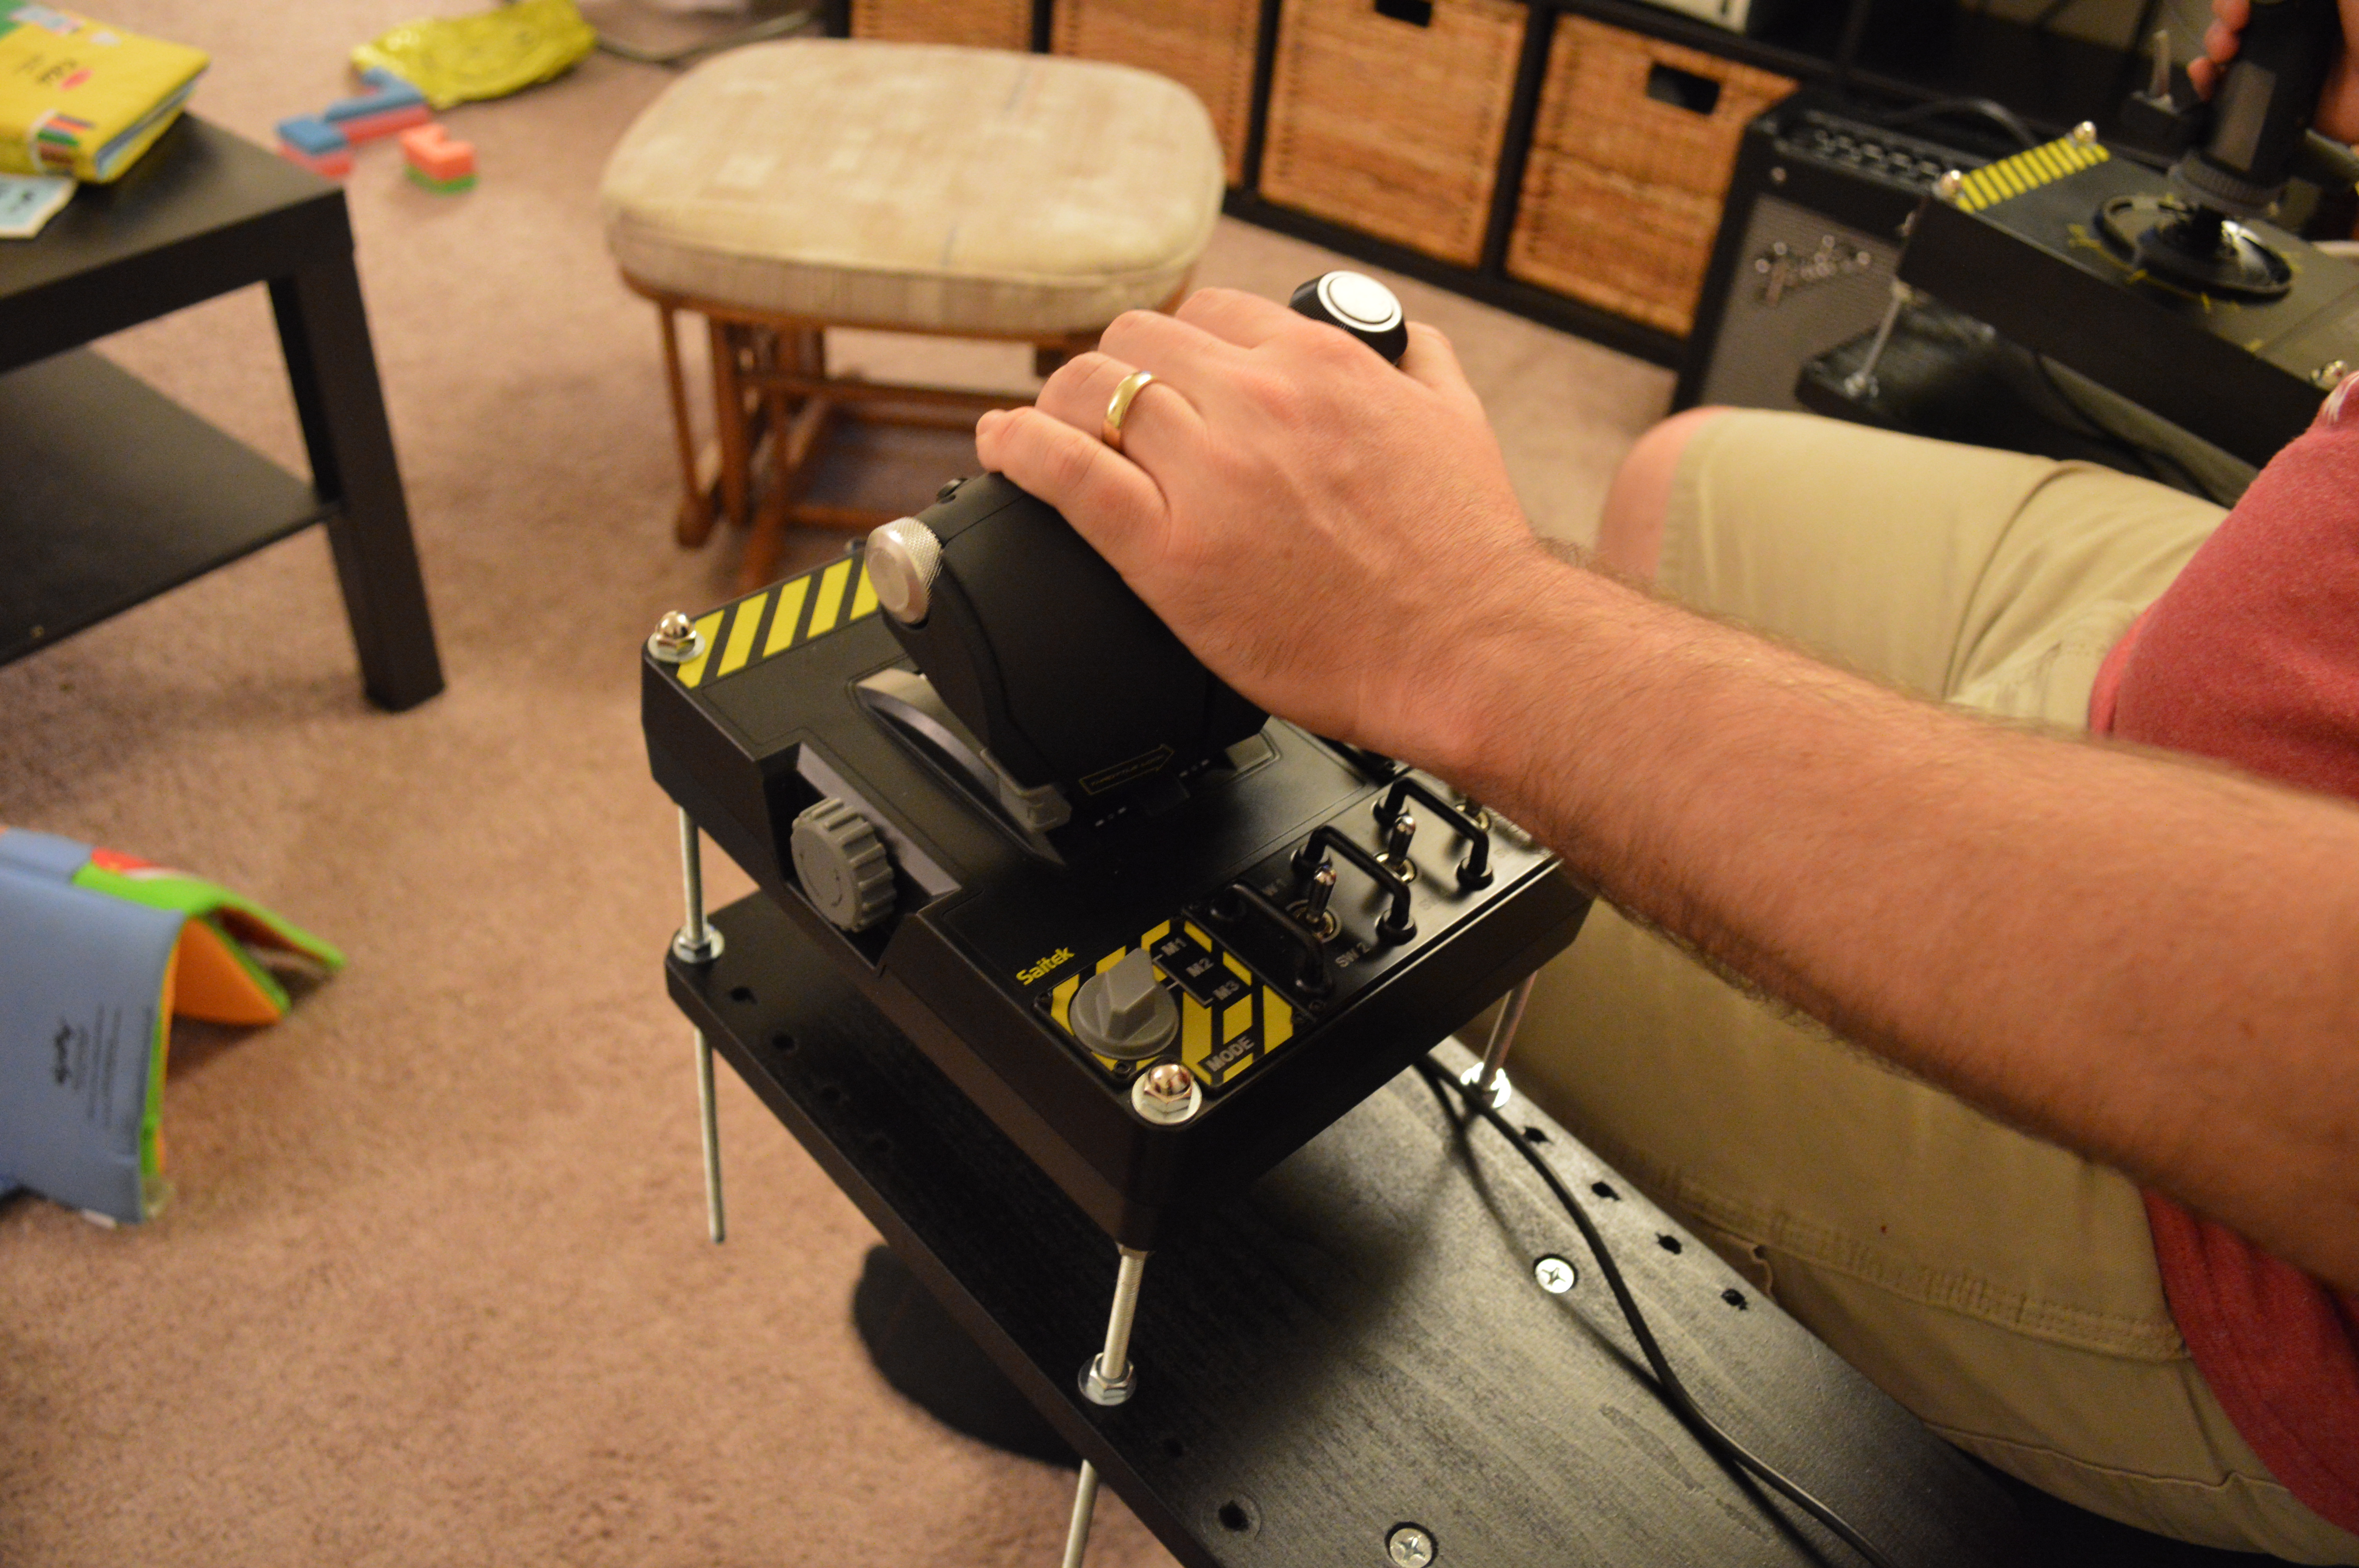
I had also took the opportunity to upgrade the steel braces for the shelf to 5”, and alter the orientation. The new orientation still used two 90’ brackets, but each had the cantilevered portion facing over the aluminum bar from opposite directions. Now I have a more sturdy and rotation free cross beam, and I have the brackets opposing any rotation. The extra inch on the brackets just puts the HOTAS units it a better starting position.
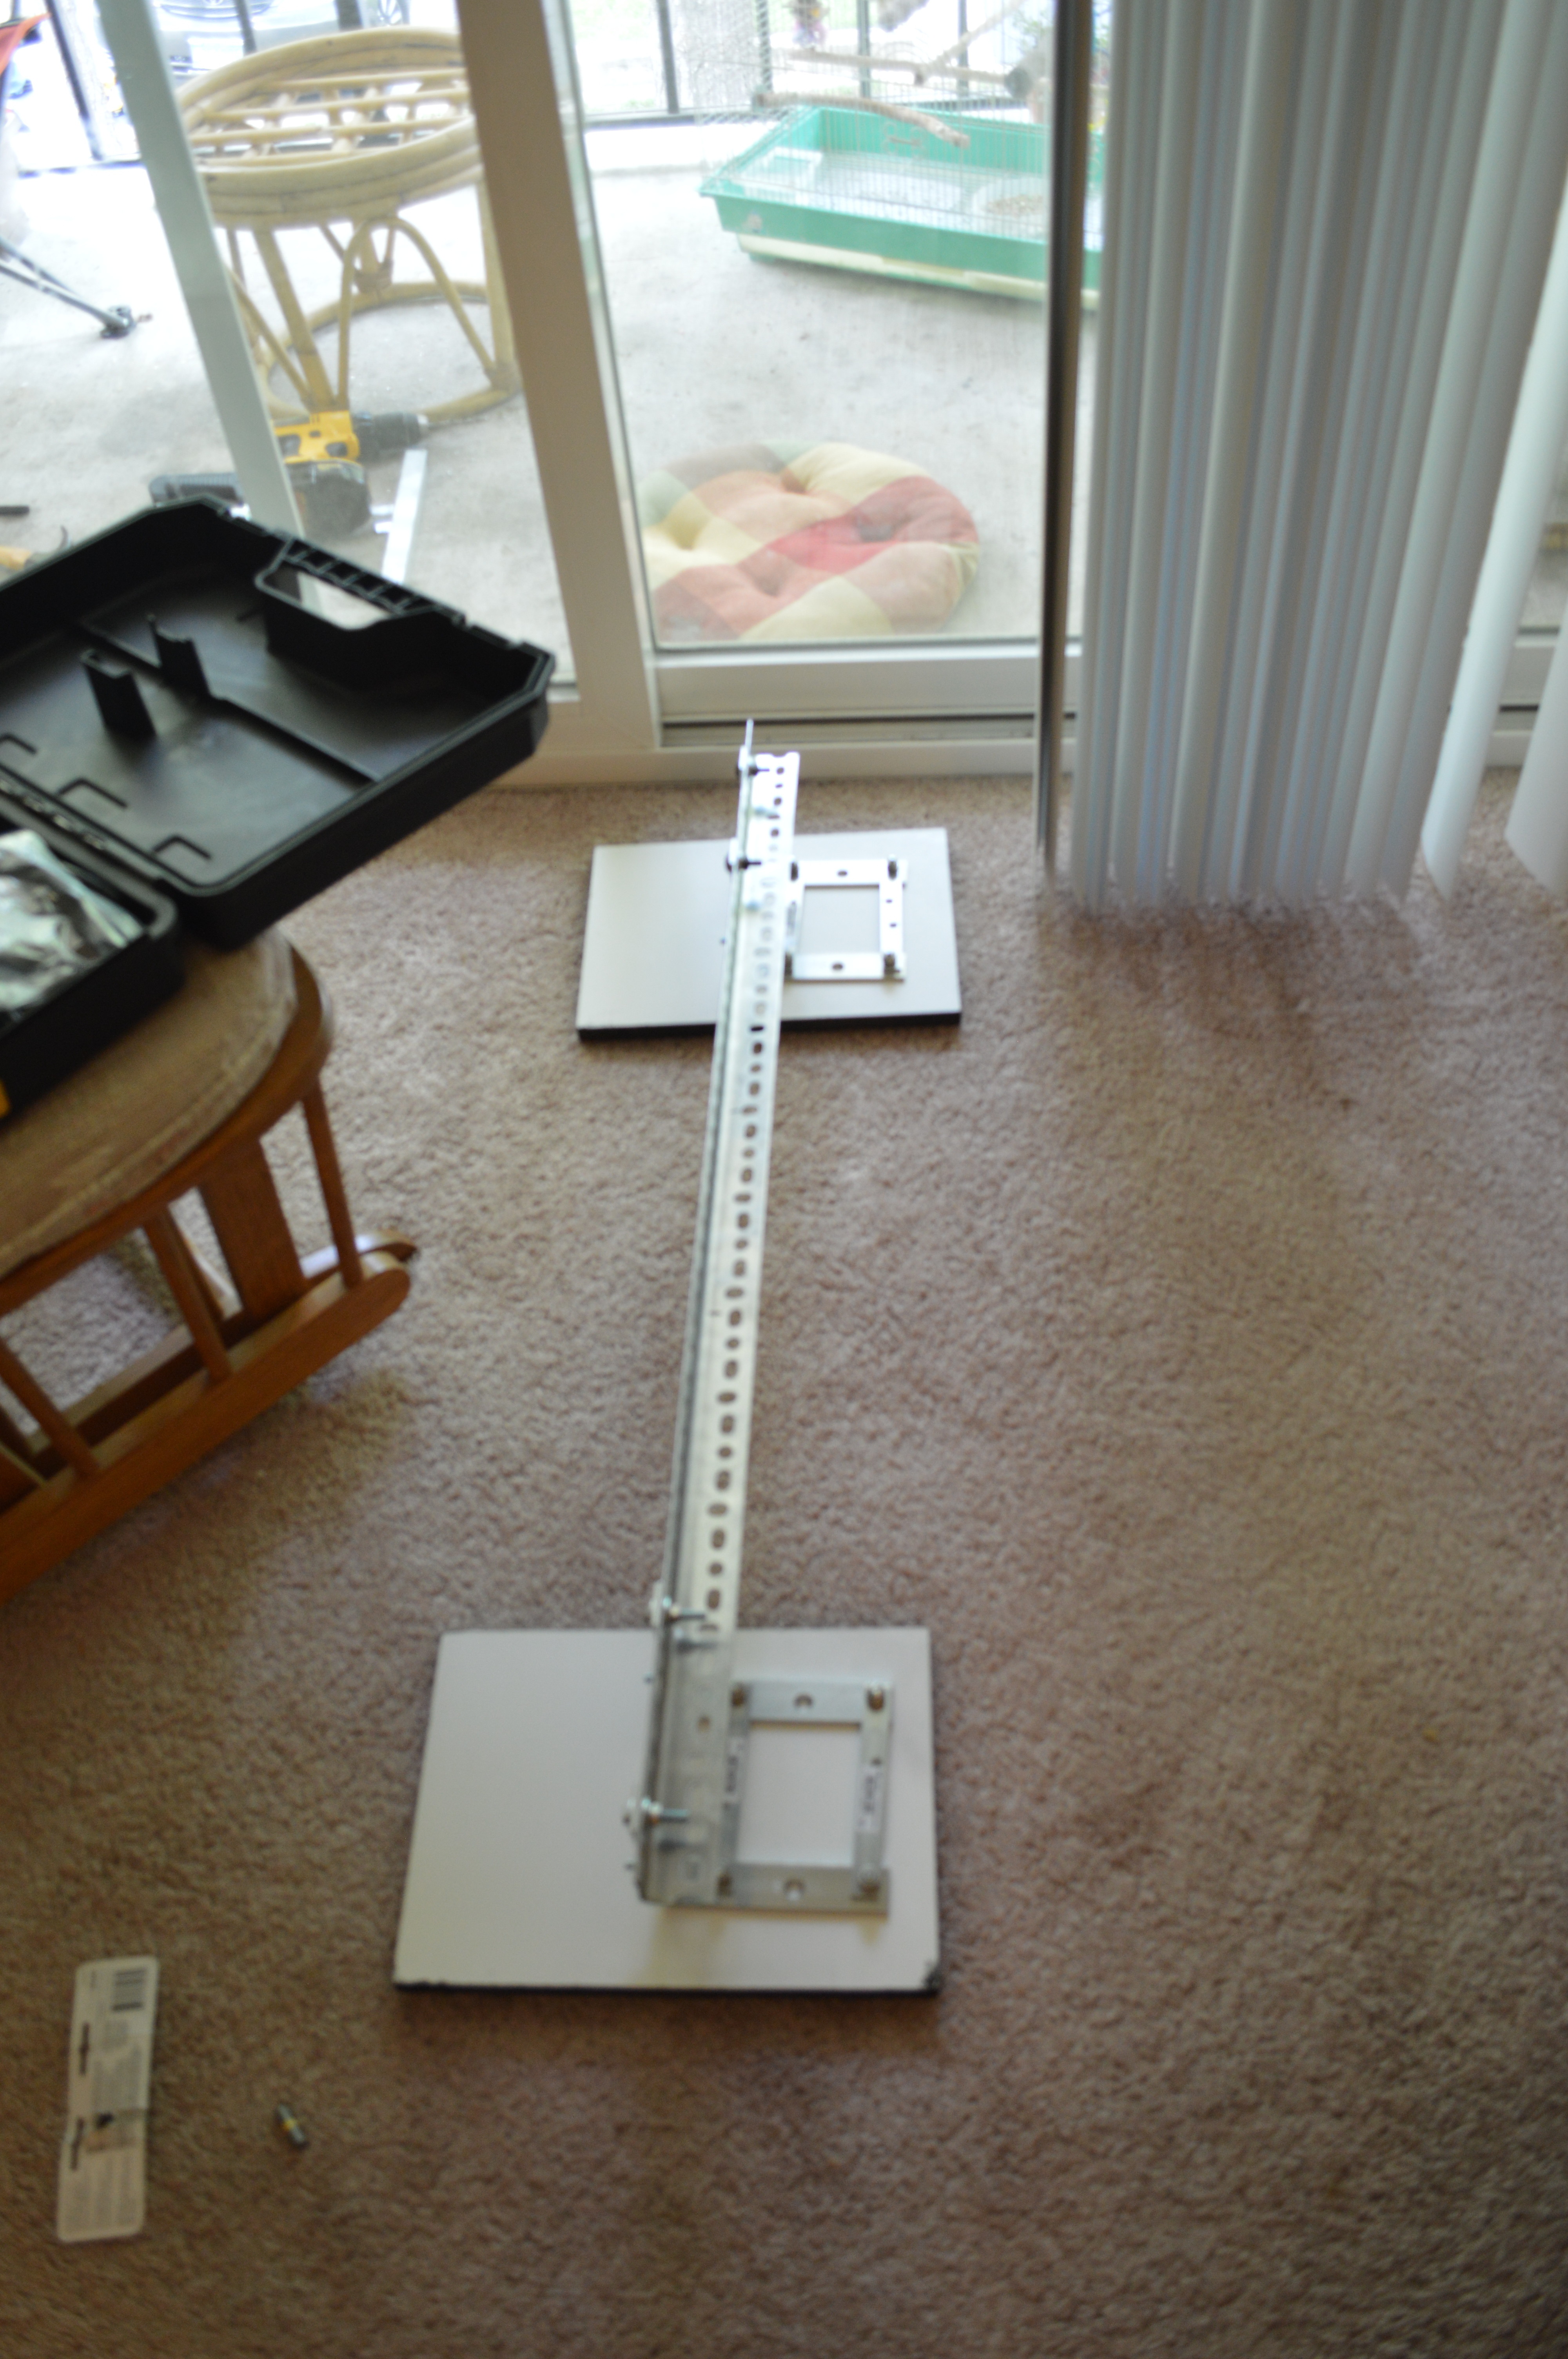
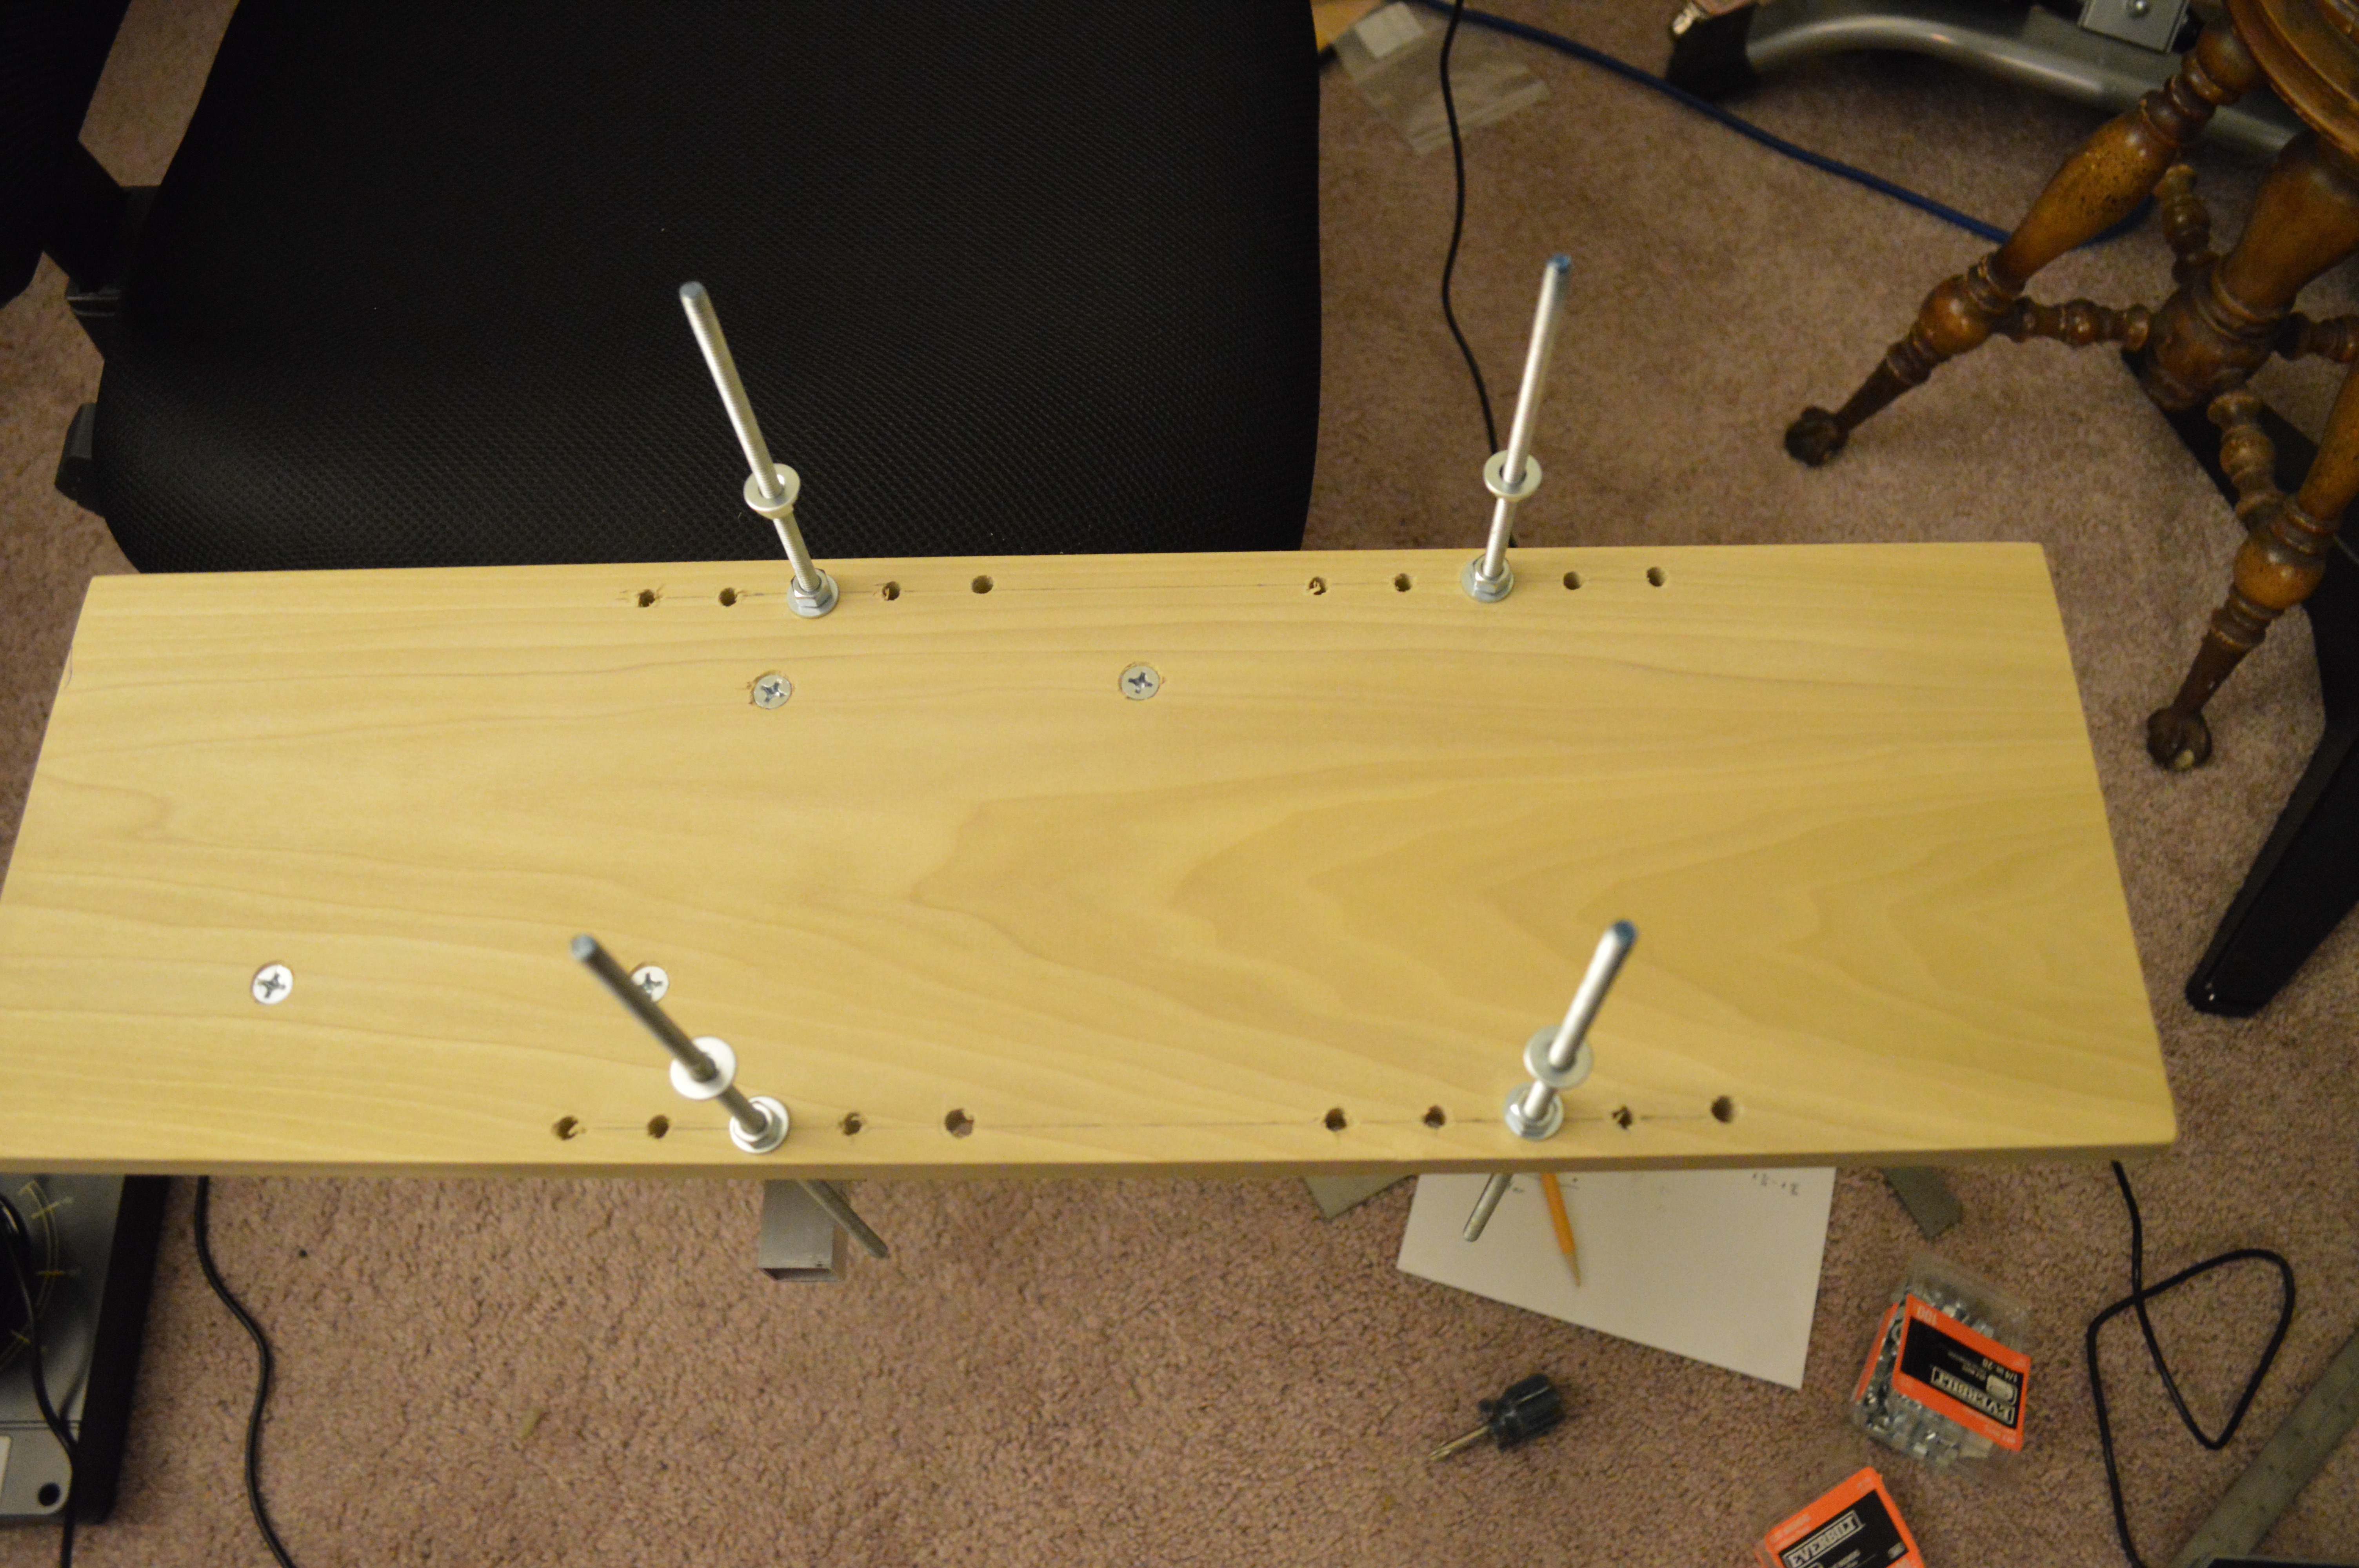
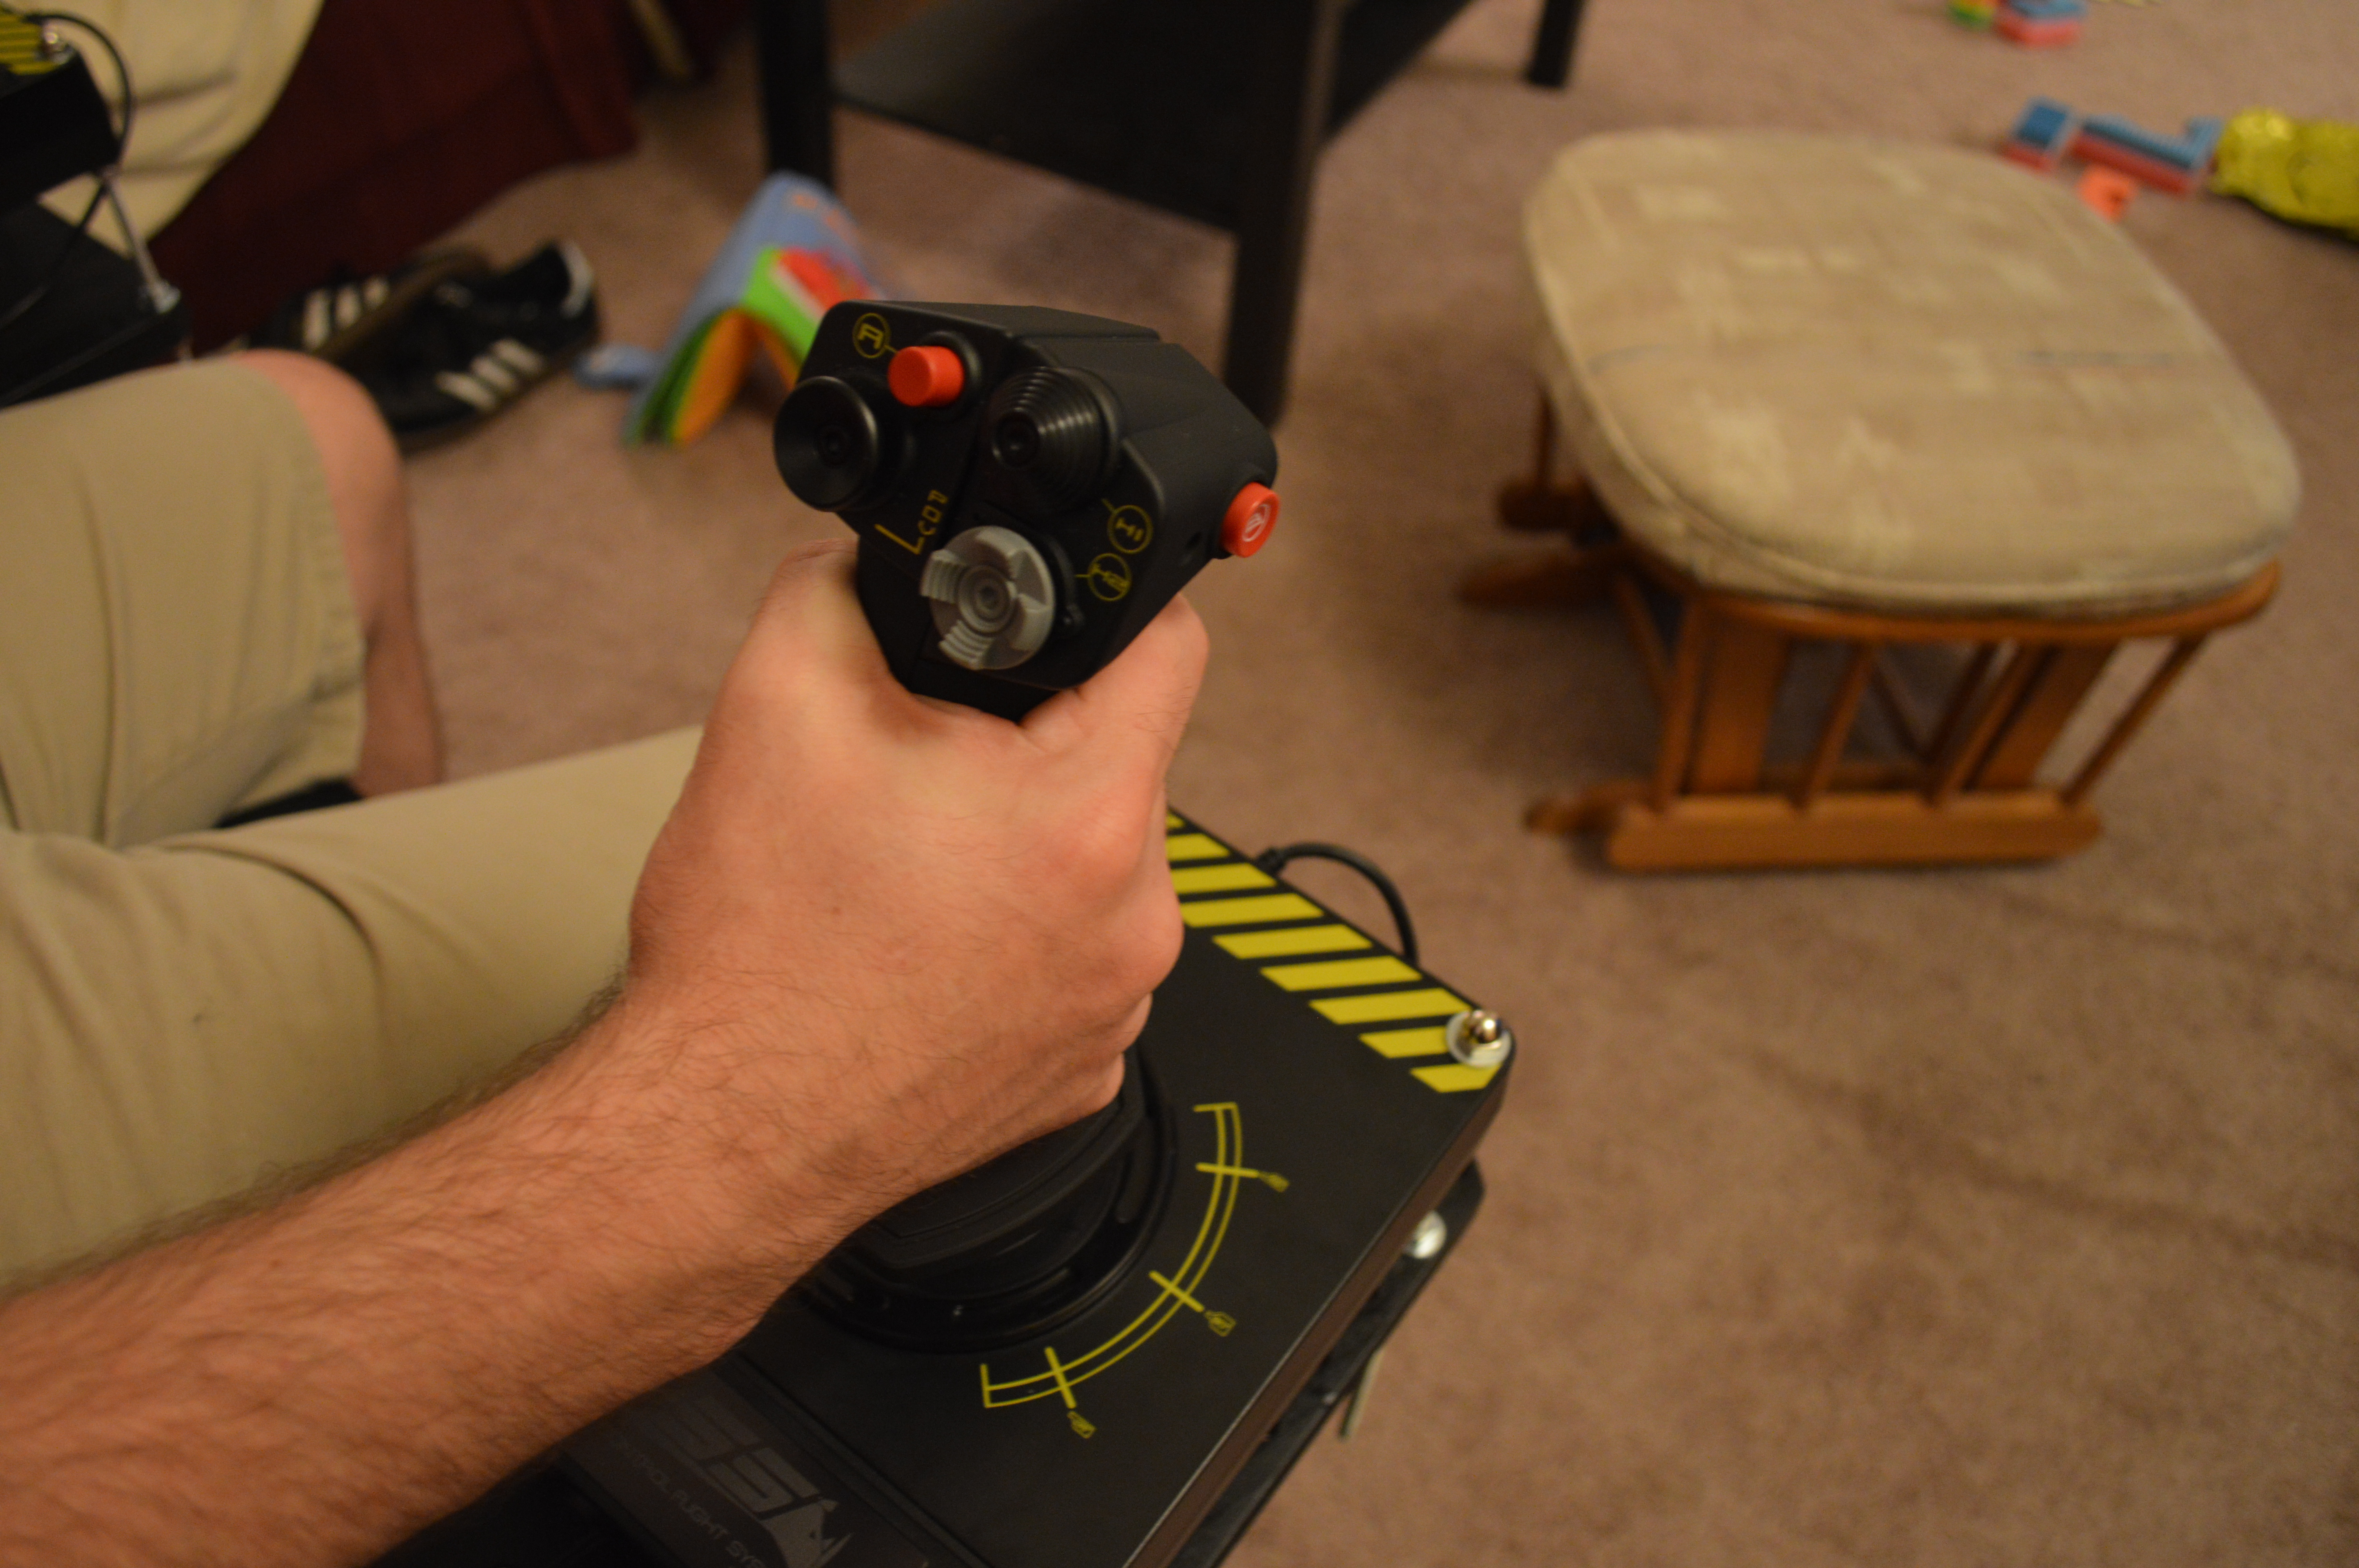
The final upgrade was to a piece of poplar board instead of the shelf I bought from ACE. The board would accept the spray paint finish better, and I prefer working with hardwood. I measured the new bolt holes on the boards, drilled the holes to be counter-sunk, and tested the fitting on the brackets. All was well, with almost no rotation! The final steps were measuring out a series of holes for mounting the HOTAS. I laid out 5 holes an inch apart for each mounting hole, to let me adjust the fit of the units. Using ¼” threaded rod, I got the height dialed in using washers and nuts to secure the rod to the board on both sides, and to the HOTAS. After I was certain I had enough space for adjustment, I cut the 12” rods down to 6”, capped them with acorn nuts for pretty, spray painted the boards black, and mounted everything. Finishing touches included sawing off excess board and cutting the corners diagonally to make it both more appealing and less likely to take out a toddler’s eye. I also sanded all the edges down, and spray painted the boards black.
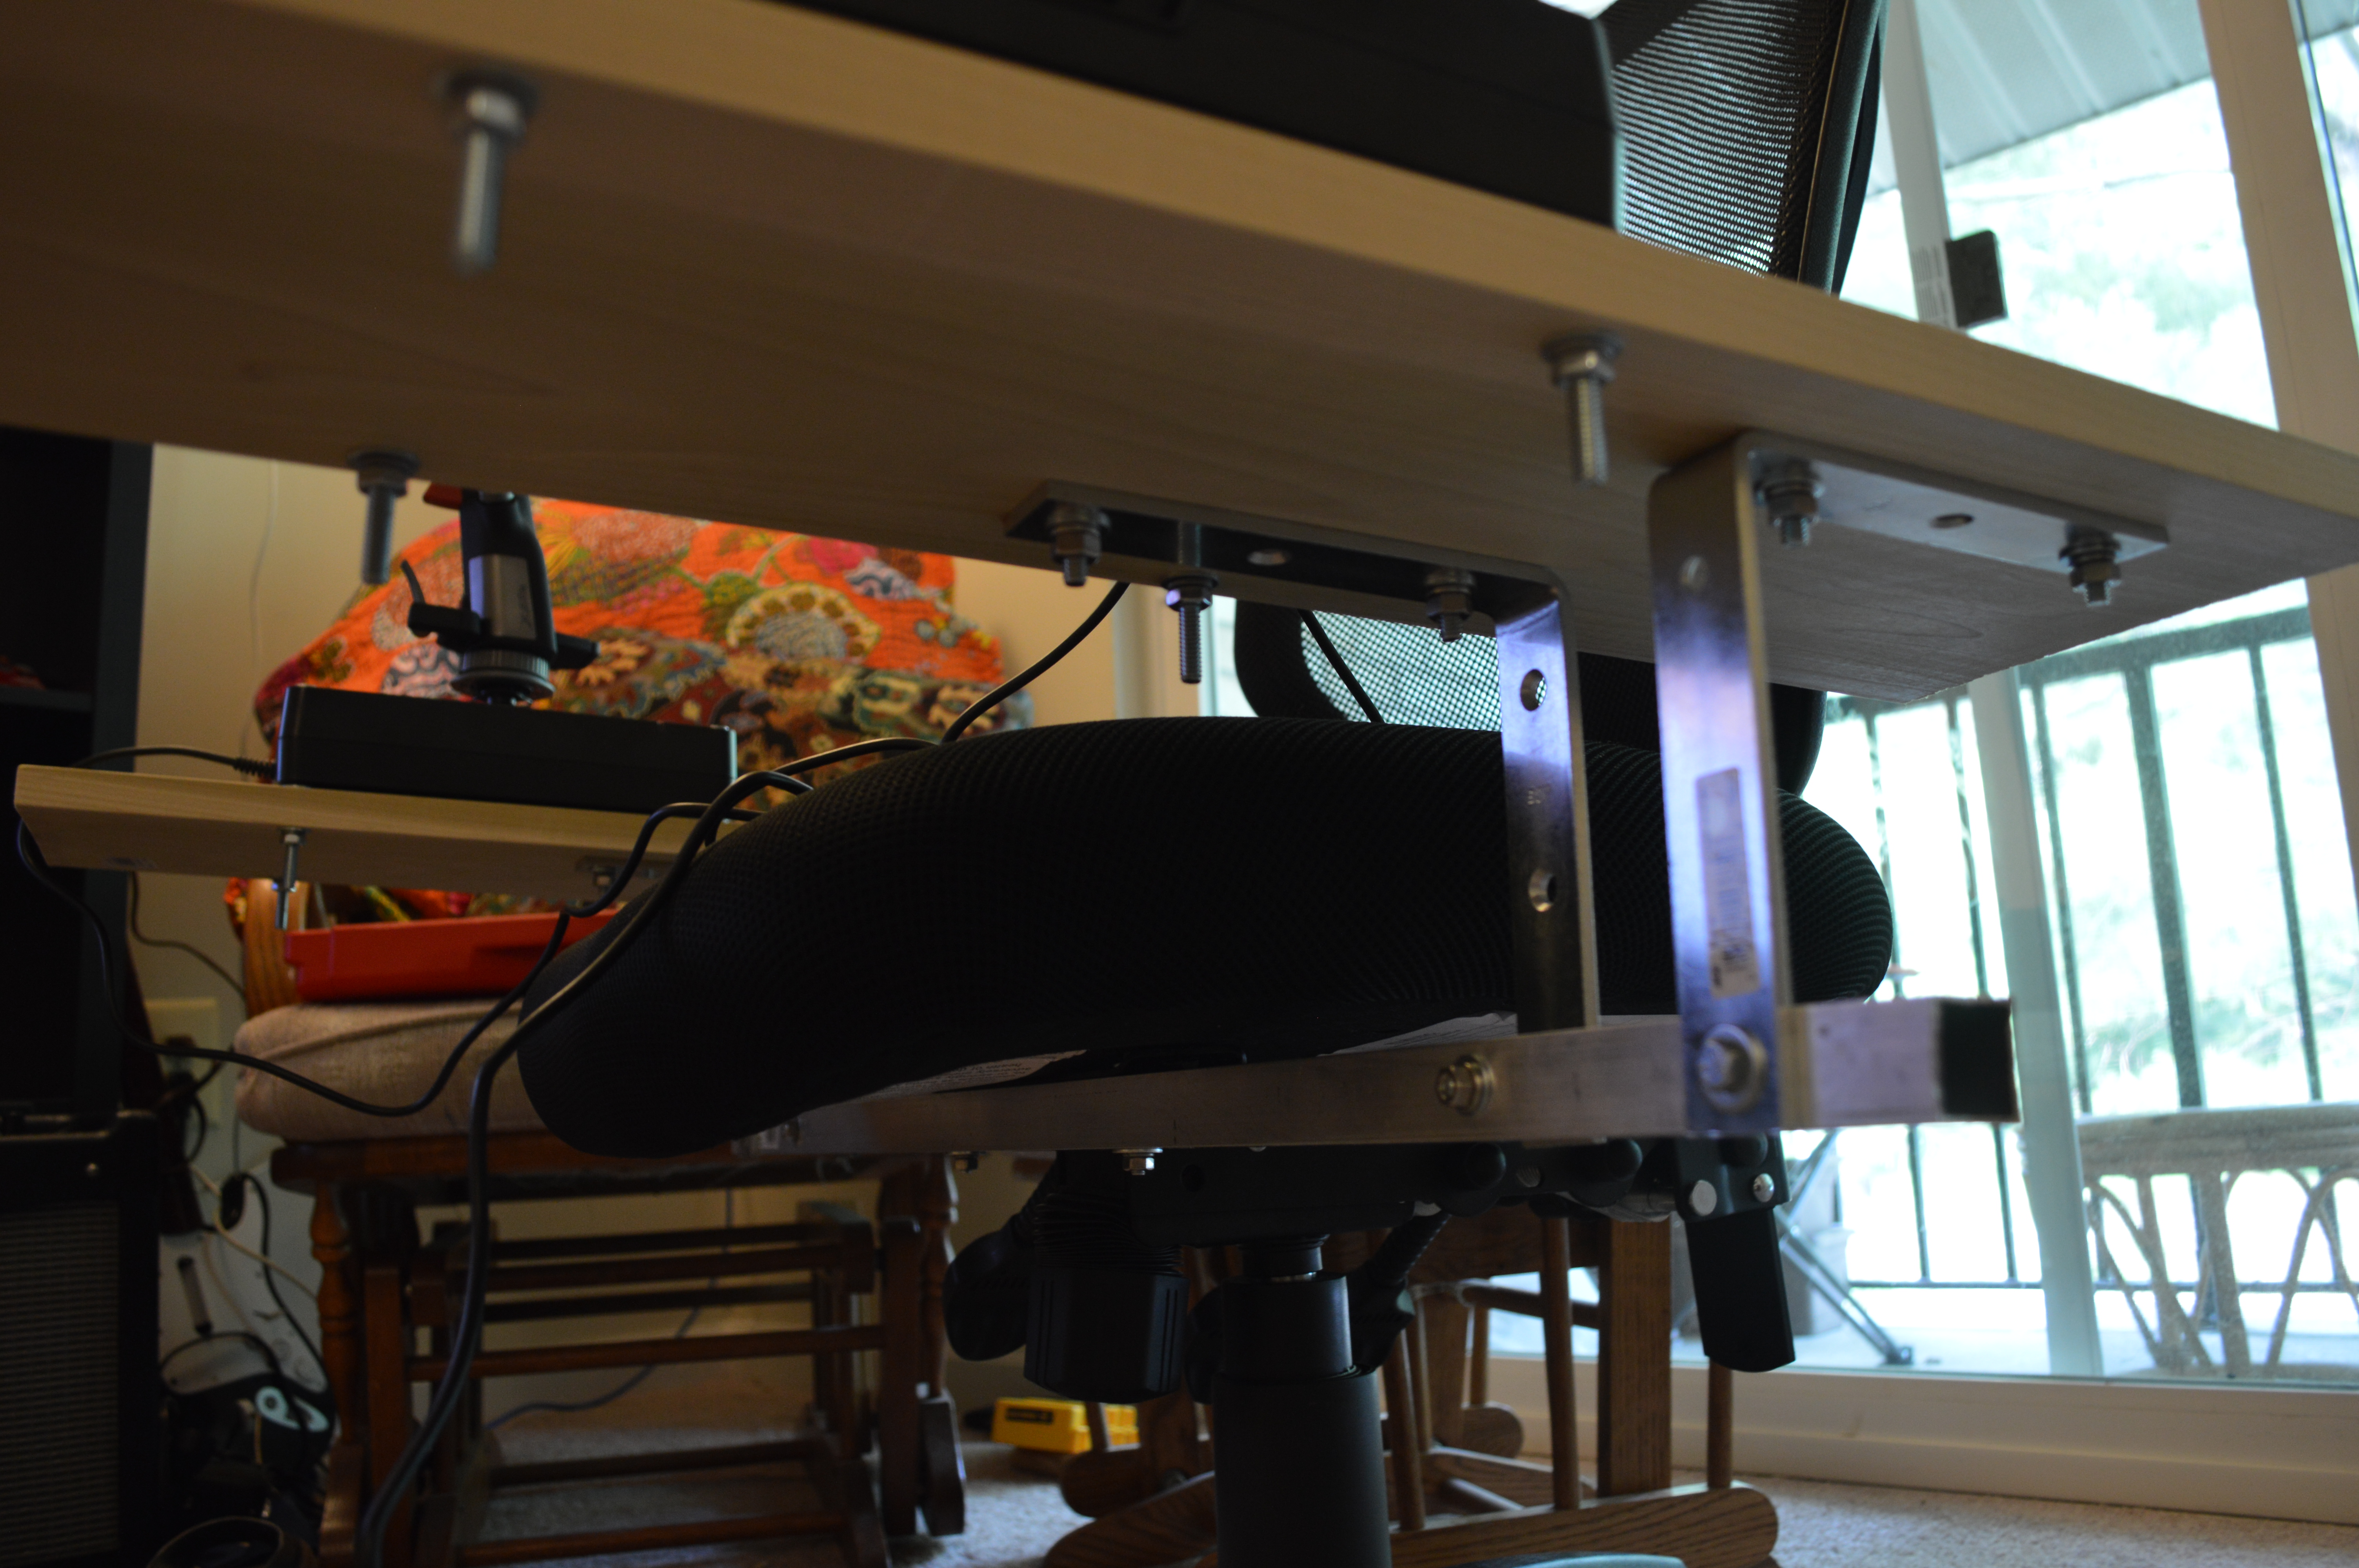

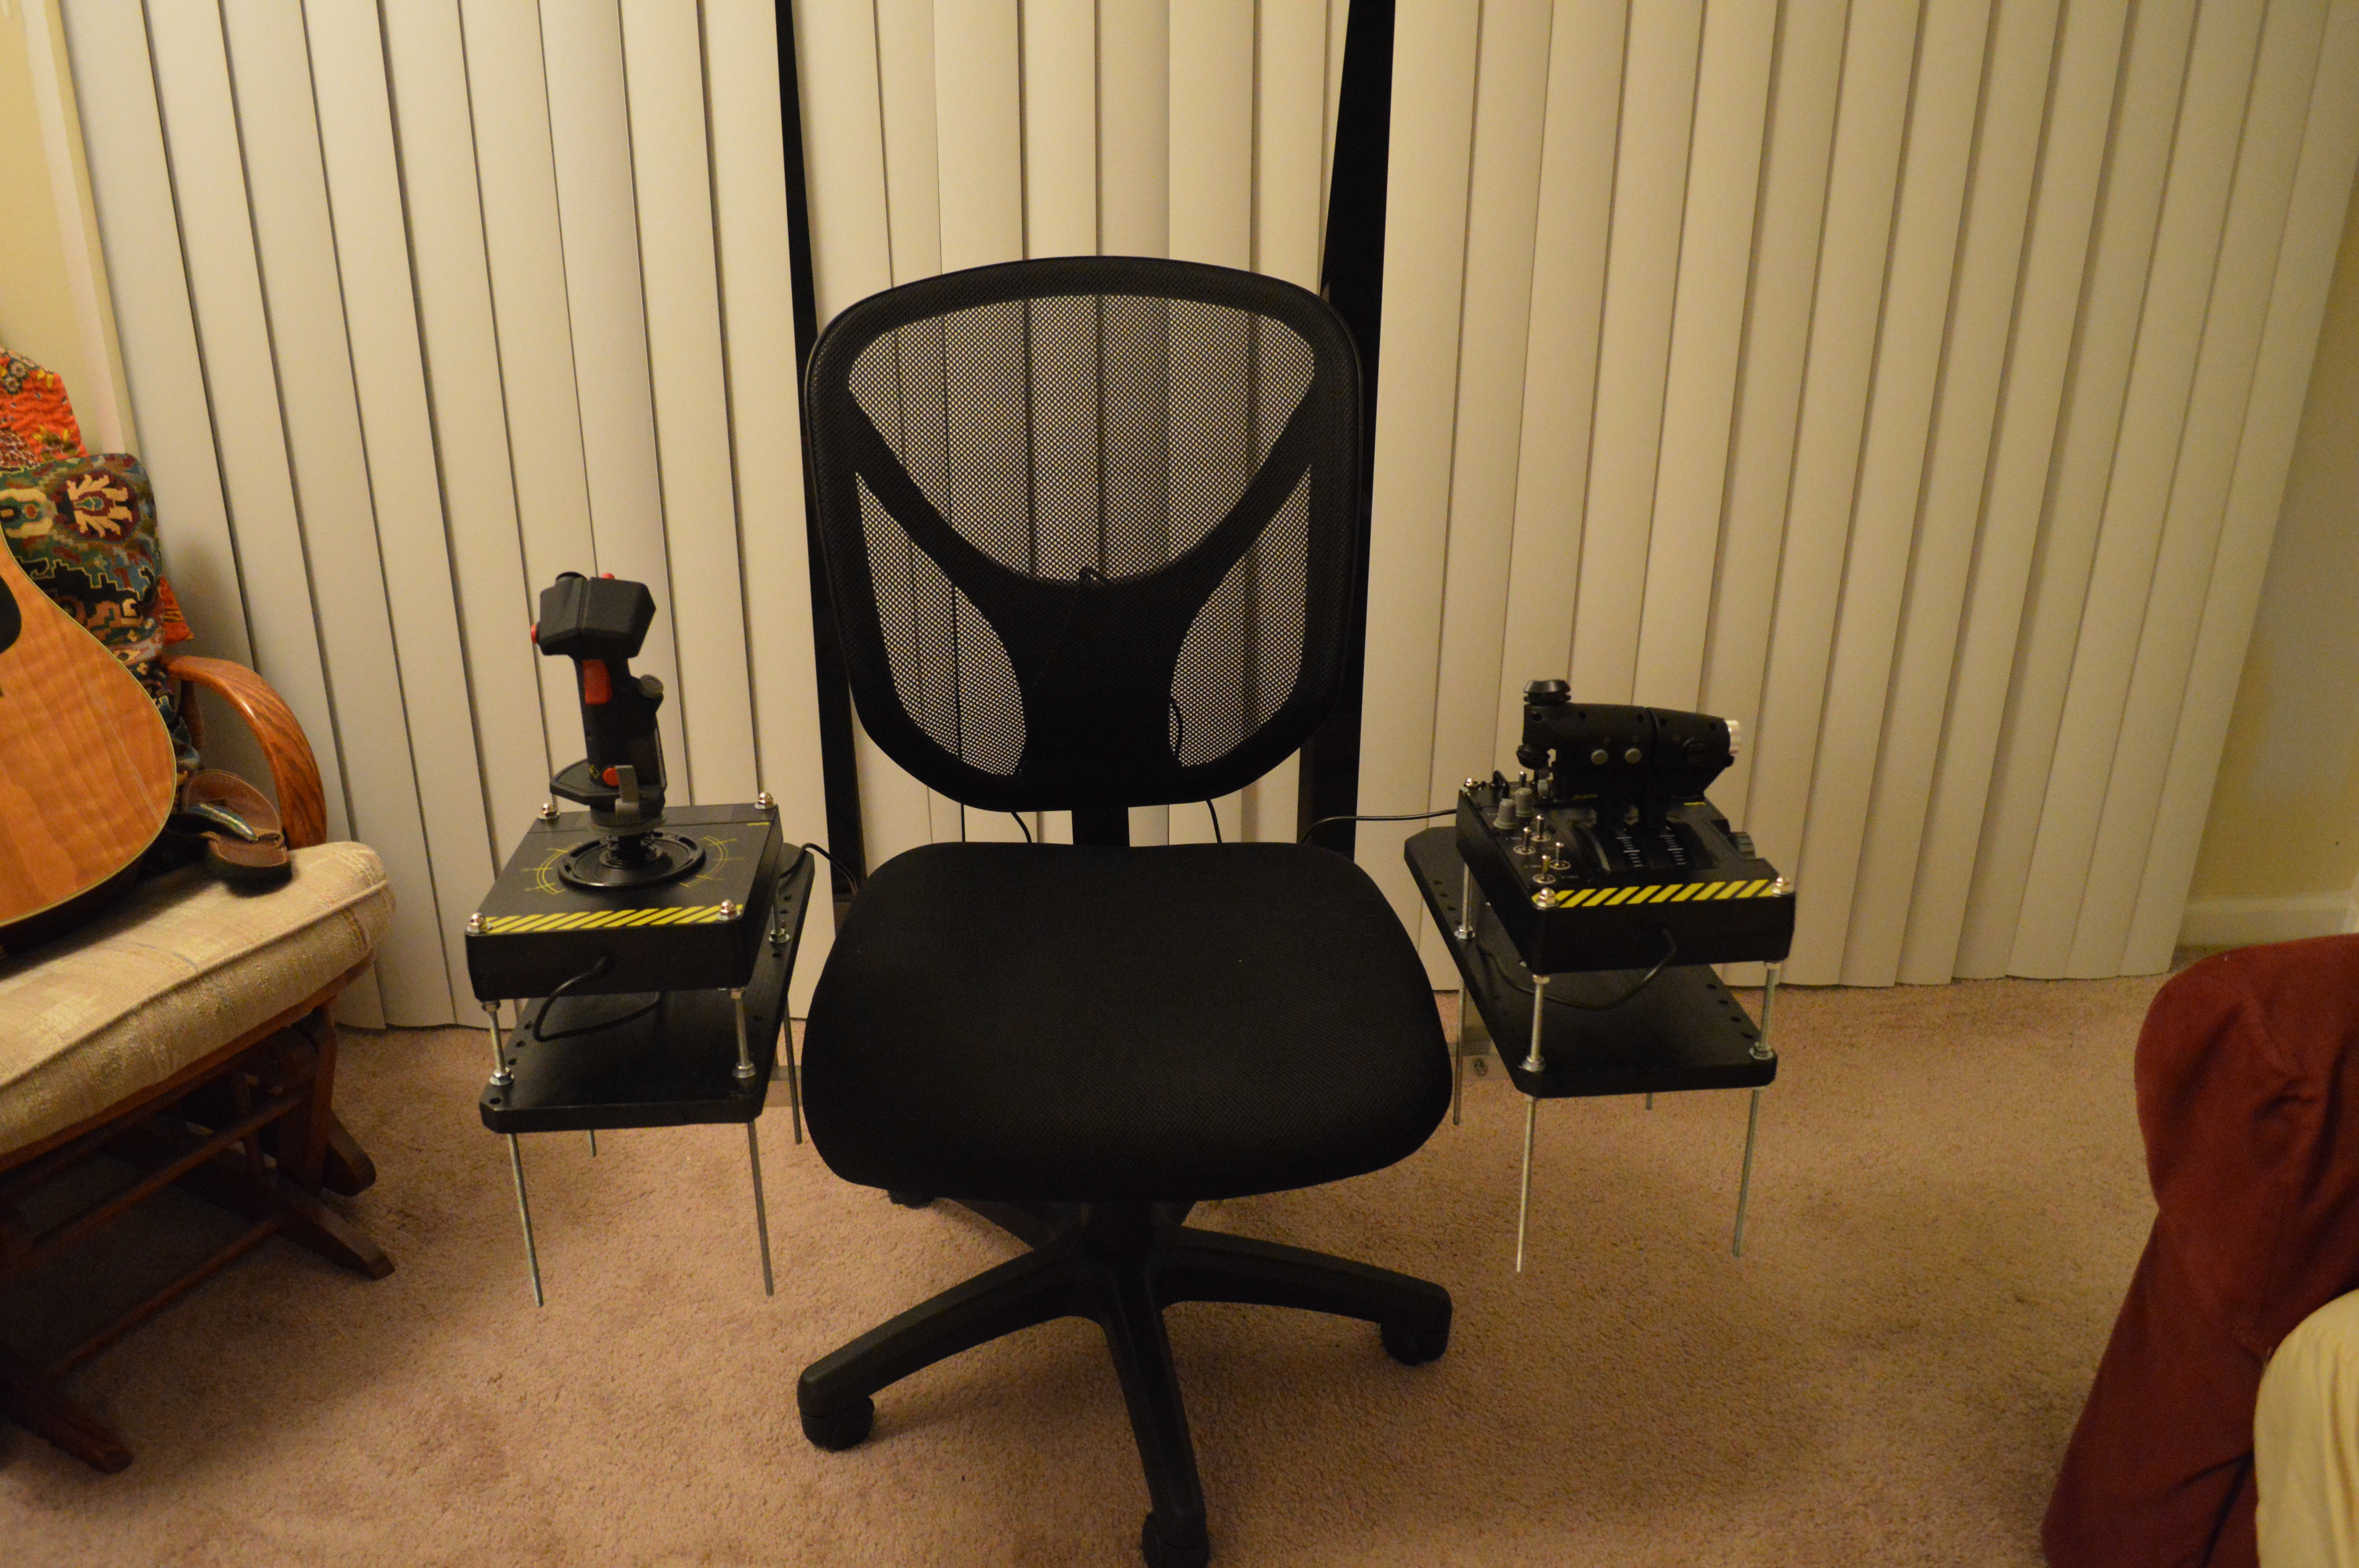
After all is said and done, I also ordered two 15’ USB extender cables so that the chair can move a bit once plugged in. The built in cables are about 6’ long, which means that once I am plugged in for a session, I have to scurry over the HOTAS units to get out. Not a great system. I have attached the USB extenders to the back of the chair, so I have some slack to maneuver with now. I also replaced the locking nuts and normal nuts on the bracket to crossbeam joint with wing nuts, so I can more easily remove the HOTAS unit when I don’t want it attached. It takes 2-3 minutes, but is a nice option if I am going to want to get a bit closer to my desk when not using the HOTAS.
The final build looks fairly nice, all metal and black flat surfaces. The HOATS units have 5 inches of horizontal adjustment and about 3 inches of vertical, so I can fine tune the location of everything. All in all, flying now feels like I am commanding a ship, not just playing a game. The total build cost was about $75 for just the materials for the beam, brackets and shelf. The chair was another $100, and the HOTAS was $175. All of this comes in well under the $500+ for a chair alone that you find online.

A few notes:
For height, I am about 5’8”, so a 36” crossbar and 6” threaded bolt works for me. If you are bigger/taller, you might need to adjust these. I suggest starting longer and cutting down to size to fit your body.
Home Depot and Lowes have terrible selection of hardware for a project like this. You have to either buy expensive pre-set quantities or whole boxes of goods. Pretty much the only thing you need that an ACE or local shop won’t have is the board for the mounting platforms.
If you want active USB extenders, just order online, Best Buy and Office Depot do not have these items, and the cables they do have are outrageously expensive.
Parts List:
| Item | Qty | Cost | Sub Total |
| 36″ Aluminium Bar | 1 | $ 15.00 | $ 15.00 |
| M6 1.5 inch bolt | 10 | $ 0.43 | $ 4.30 |
| M6 1.5 inch bolt flathead | 8 | $ 0.50 | $ 4.00 |
| M6 Washers | 20 | $ 0.12 | $ 2.40 |
| M6 Lock washers | 20 | $ 0.12 | $ 2.40 |
| 1/4 Threaded rod 12″ | 8 | $ 0.98 | $ 7.84 |
| 1/4 Acorn nut | 8 | $ 0.70 | $ 5.60 |
| 1/4 wing nut | 4 | $ 0.70 | $ 2.80 |
| 1/4 nut (Box 50) | 1 | $ 5.00 | $ 5.00 |
| 1/4 wash (Box 50) | 1 | $ 5.00 | $ 5.00 |
| 1/4 Lock washer | 8 | $ 0.22 | $ 1.76 |
| Poplar Board 4′ | 1 | $ 10.00 | $ 10.00 |
| Steel 90′ bracket | 4 | $ 5.98 | $ 23.92 |
| Black Spray Paint | 1 | $ 6.00 | $ 6.00 |
| Total | $ 96.02 | ||
| Additional Items | |||
| Office Chair | 1 | $ 100.00 | $ 100.00 |
| Active USB cable 15′ extension | 2 | $ 9.99 | $ 19.98 |
| X55 Hotas | 1 | $ 175.00 | $ 175.00 |
| Total | $ 294.98 |