A New Fort
With the release of Dwarf Fortress v40, or whatever, I decided to play through a new fort, and document it. This is in part to learn the changes myself, and in part to help teach some friends how to get started in DF.
A few notes: I will assume you know how to use the interface to DF. If not, check the DF wiki quickstart guide I link below, or look it up on the wiki. Similarly, if I say to build or make things, look it up in that guide or the wiki. The processes are simple once you understand them, but extremely tedious to write out every time. Others have done this already, so I will let their work do the heavy lifting! In a few places I may call out keystrokes to do things, but not often. You’ll find that DF is game you rapidly learn to play with two hands on the keyboard.
The format of these posts will be a big first post, where I lay some basic steps that are vital for the first few months of a fortress. Then I will start to show pictures and follow the building of my fortress, explaining what I am doing as I go. I have a plan in mind, but as with all plans, it may or may not survive contact with goblins and dwarven tempers.
First Steps
Get the PeridexisErrant Newb Pack. It has a few tileset options to make the game easier to visually parce, and a host of nice utilities like Dwarf Therapist, a must in my opinion, and things like Quick Fort, which I use to plan out portions of base design I keep repeating in each fortress. Installation is easy, just unzip it somewhere, and launcher the launcher.
Choosing a Location
For new players, there is a great guide at the DF wiki for getting started. Start off and generate a world, probably with high mineral density for ease of learning. To paraphrase the wiki page, find an embark that is flat-ish with no aquifers (you can cheat with the Newb Pack to disable aquifers completely), soil, sand, trees, shallow and deep minerals, and maybe a river or a body of water. If you think you found a good spot, and don’t like it, abandond the fort, or just close the game. Take the “Play now!” embark to start with a pretty basic and foolproof embark profile.
Breaking Ground
When you embark, you’ll have seven dwarves, two picks, and axe, and various items including a few animals, some food and drink, and miscellany. If you have a decent sized hill, pick a nice central spot made of soil and dig into it, making a 3 tile wide tunnel and dig it a good 20-30 tiles in. If you are on a plain, channel a 3×3 area, the move down a z-level using [Shift->] and [shift-<], and dig into one of the sides. Then designate some trees for chopping down (yay, multi-level trees get you wood faster now!), and designate a good area of plants for gathering. Outside the tunnel, designate a refuse and garbage stockpile, about 5×5. Designate a wood stockpile too. Check in Dwarf Therapist (DT) and is any dwarves have fishing or hunting enabled, turn it off for now.
Once your miners have got the main tunnel dug, dig out a 5×5 room with a 3 tile entrance a bit back from your main entrance. This will be for your trade depot. Also dig out 3-6 11×11 rooms with one or two spaces for 1 tile doors. At least one of these should remain in the soil layer, if at all possible, as it will be your first farm. The others will be for a general stockpile, a food stock pile, a workshop room, and a room for your first dining hall, dormitory, and a few miscellaneous things.
Building Basics
While these rooms are being dug out, designated a raising bridge to be built at the entrance of the main tunnel. Make sure the bridge raises towards your interior, so if the tunnel opens to the west, have the bridge raise to the east. Also, in the workshop room, build a Mechanic’s Workshop, a Carpenter’s Workshop, and a Craftsdwarf Workshop.
Once those are built, have the mechanic build mechanisms, 10 if you have a lot of trees, if not just put it on repeat. You need stone for this. If you have not found any yet, dig down by digging stairs. You can build these at the end of you main tunnel by digging one set of down stairs (if there is no more dirt above you, on a plain) or using up-down stairs (if you are in a hill/mountain). Then continue digging stairs down until you find some stone. Not clay, sand, soil or peat, actual stone. Once you find it, just designate a moderately decent chunk to be dug. Say 20×20 or so to start. You made your first quarry!
Have the carpenter build about 10 beds, tables and chairs. Once this finishes, if you have a lot of wood, set him to making enormous spiked wooden balls. The reason for all the mechanisms and balls is that both are good trade goods for your first few caravans later in the year. If you don’t trade them, you’ll at least have some rudimentary trap supplies in case a siege surprises you.
Once you have three mechanisms, use one to build a lever in your future dorm/meeting hall/dining room, then connect the lever to the bridge at the entrance to your fort. You now have the most basic defense: a way to seal off your fortress!
Farming Fields
Once the dirt room is dug out, designate a few 5×5 farm plots in the corners, and a 5×5 stockpile. Set the stockpile to only accept seeds, and disallow any barrels or bins (set them to 0). Then, set your fields up. Give one over to plump helmets, and split other crops amongst the others. You’ll notice that you need to set the crop for each season, and some crops only grow in some seasons. If you are very conservative, do not grow in the last season a crop can be planted, as you may lose some seeds via plant death at the end of the season. Check the DF wiki page of farming to learn more about the nitty gritty details if you want.
One note about farming: Early on, you may want to avoid cooking plants. Unlike any other plant processing task, it does not give a seed, so it makes farming unsustainable. The easiest way to avoid this is to not cook. Your dwarves will survive a year or two eating raw food. Another way is to use the stockpile settings to have your eventual plant stockpile not give to kitchens, or use the stocks menu to disable cooking of certain plants. This gets a bit more intricate, though, so I’ll leave it at that for now.
Second Note: Quarry bushes (grown from Rock Nuts), if you have them, are great for food. But you need to process them into bags at a Farmer’s Workshop, and then cook the resulting leaves. If you have quarry bushes, check them out on the DF wiki for more detailed info.
Rest and Recreation
One more room to set up, the dining hall dormitory! Go to one of the 11×11 rooms, the one you put the lever to the bridge in. In one corner place some of the beds you made, 3-6 should be good. Then select one and make it a room, and then make that room a dormitory. In another corner, place a few tables and chairs. Select one, make it a dining room. Make a zone over the whole room, and designate it your meeting area. Now you have eating and sleeping quarters, which makes dwarves happier, and a place for new migrants to come to when they arrive!
Get En-Nobled
In the dining/dorm room, in a spare corner, place two table and chairs, with a space between. Now go to your nobles screen, and assign a bookkeeper, manager, and broker. You will see that are missing requirements. Got back to those two table/chair combos, and make each a room, containing as little as possible beyond the table and chair, and assign one each to the bookkeeper and manager. Now you have all the nobles you need, for the time. You also have the ability to assign jobs without going to a workshop, and your bookkeeper will occasionally sit down and update your inventories so your stock screens are accurate. I recommend going into the bookkeeper’s setting in the nobles menu and setting the accuracy to the highest amount.
Zoning, Odds and Ends
- At some point, make a food stockpile inside the fort. Dig a room if you need to. This gets your food and booze inside.
- If you have the space in your stockpiles, deconstruct your wagon. This will cause all the odds and ends that were in the wagon to be hauled into the fort stockpiles, if you have room.
- If you have cats, make a pasture zone over the food stockpile and assign them there to kill vermin that might eat your food.
- If you have dogs, make a pasture zone behind your bridge and put them there to guard and act as lookouts.
- If you have horses/yaks/bulls/other grazers, give them a big pasture zone near the entrance of your fort.
- Find the closest water source on the map, and designated it a drinking water zone. If you run out of booze, your dwarves will go to the closest, and therefore arguably safest place to not die of thirst. Or to bathe.
- If you have lots of trees and they bear fruit, have your carpenter build some stepladders. Then designate a plant gathering zone. This will let your plant gatherers go grab fruit for food and booze production when they have nothing else to do.
We’ll, that’s the bare basics to getting started! Next, I’ll show you my fort, at around the first year or so.
Fort Grimmaldi
Ok, it’s not called Grimmaldi. The actual name is Ancientbrass. When I started, the map was a zig-zag river with moderate hills on the side. I chose this because I once tried to build a fortress over over a river in the Masterwork Mod. That mod is amazing, once you “figure out” vanilla DF, go give Meph’s mod a try. It doubles the number of everything, makes farming harder, adds tons of buildings, guilds, magic, reduces the clutter of the inventory system to save your mind by reducing the endless permutations of kidneys, wood types, and sub sub sub categories of items, and adds crazy fun little deathtraps to the game. Wait, my fort, yeah. I started this project in MWDF, but got sidetracked. Time to try it again!
The end goal is a fortress that has castles on both sides of the river, sinks the central shaft down the middle of the river, and creates an imposing above and below ground edifice that is also well defended through multiple fortifications, baileys, moats, trap labyrinths, and may involve a grinder. We’ll see!
This fort will also show, I hope, how to make use of phased building. In DF, many big constructions take time to complete, and eventually sieges start coming and ruining your perfect mega-project. So I have learned to build in stages that build on each other, alternate, or just branch off, allowing the newest project to be protected from the ravages of evil hordes.
In this fort, the stages I have planned are the initial warren, then the first battlement, followed by the bridge and main shaft, then the footprint of the second battlement, then expansion of the castle up into the surrounding hills. At some point a waterfall, moat, and drowning chamber are planned. The warrens will become the trap labyrinth. Enough talking, let’s take the tour!
An overview from near the middle of the map, showing both the initial base, built according to the plan above, and one of the towers that will guard the river. The river originally followed the line on the left, I simply widened it out a bit. More on that later.
One of the ramparts/towers has the foundations laid.
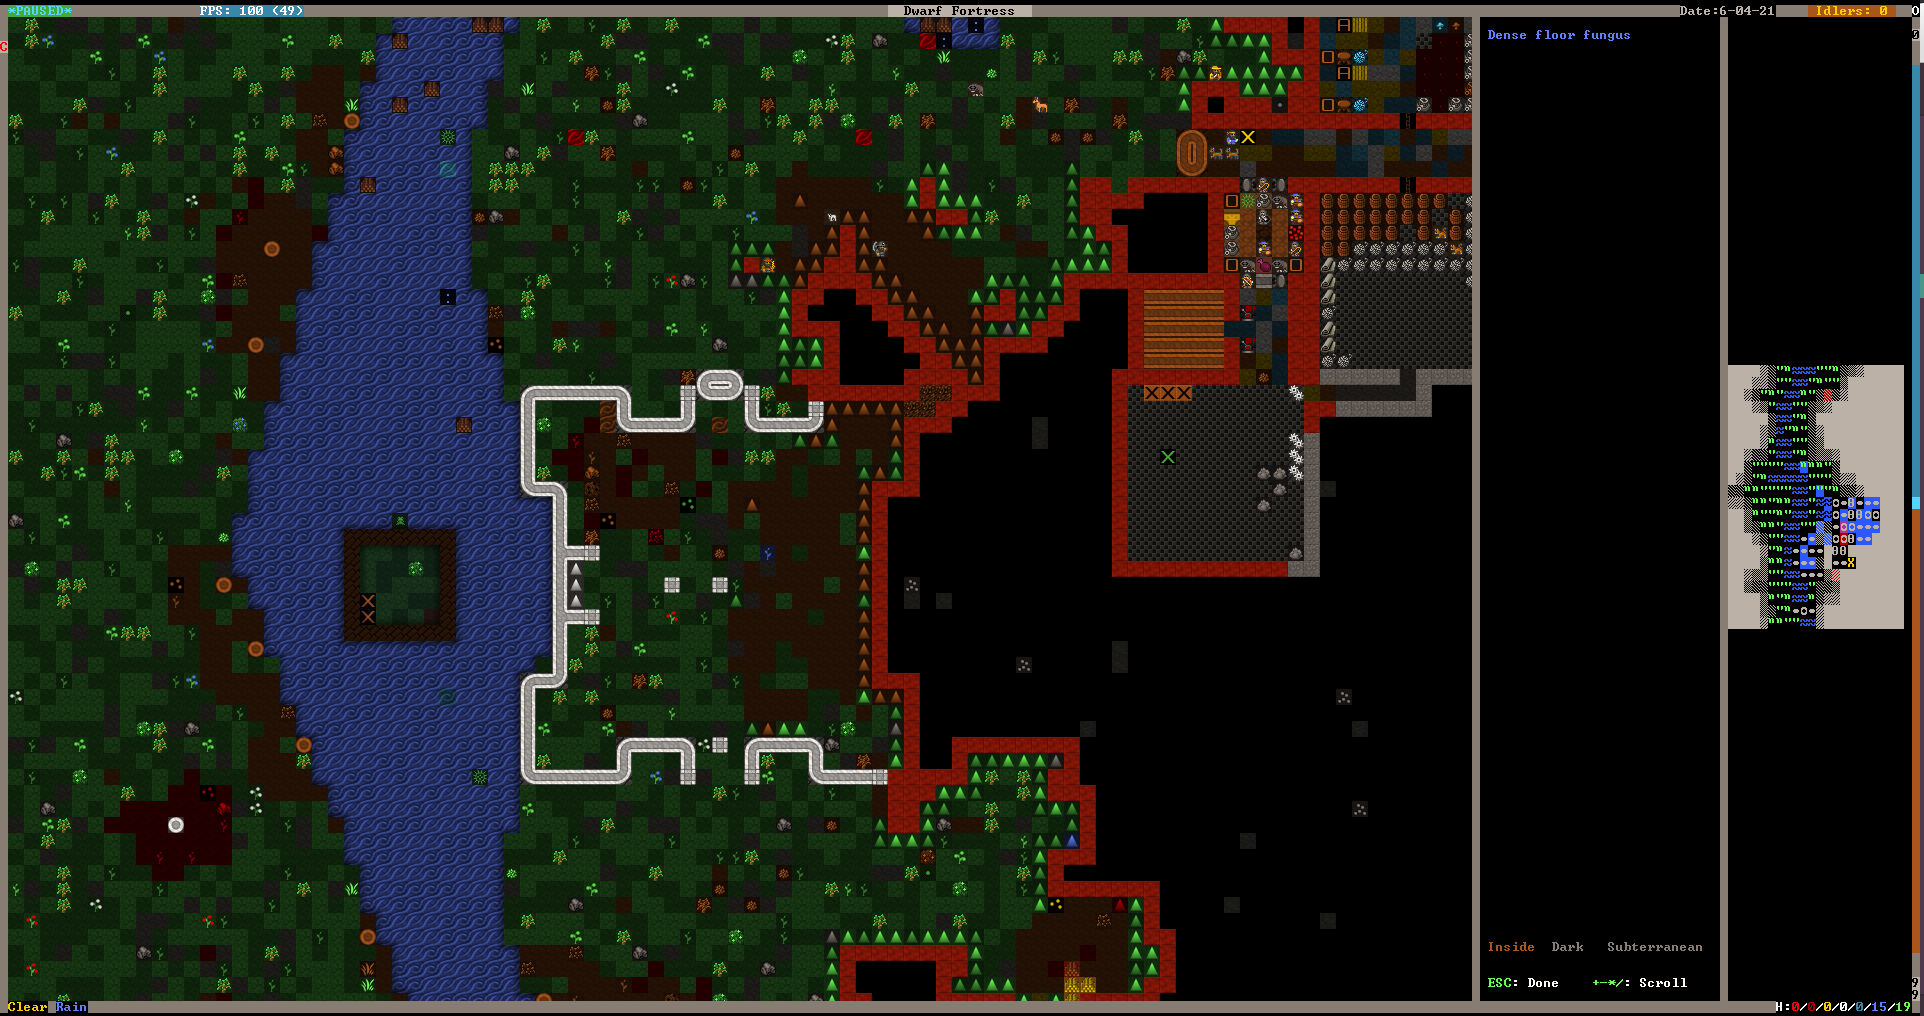
The initial fortress, built as described above:
The initial base.
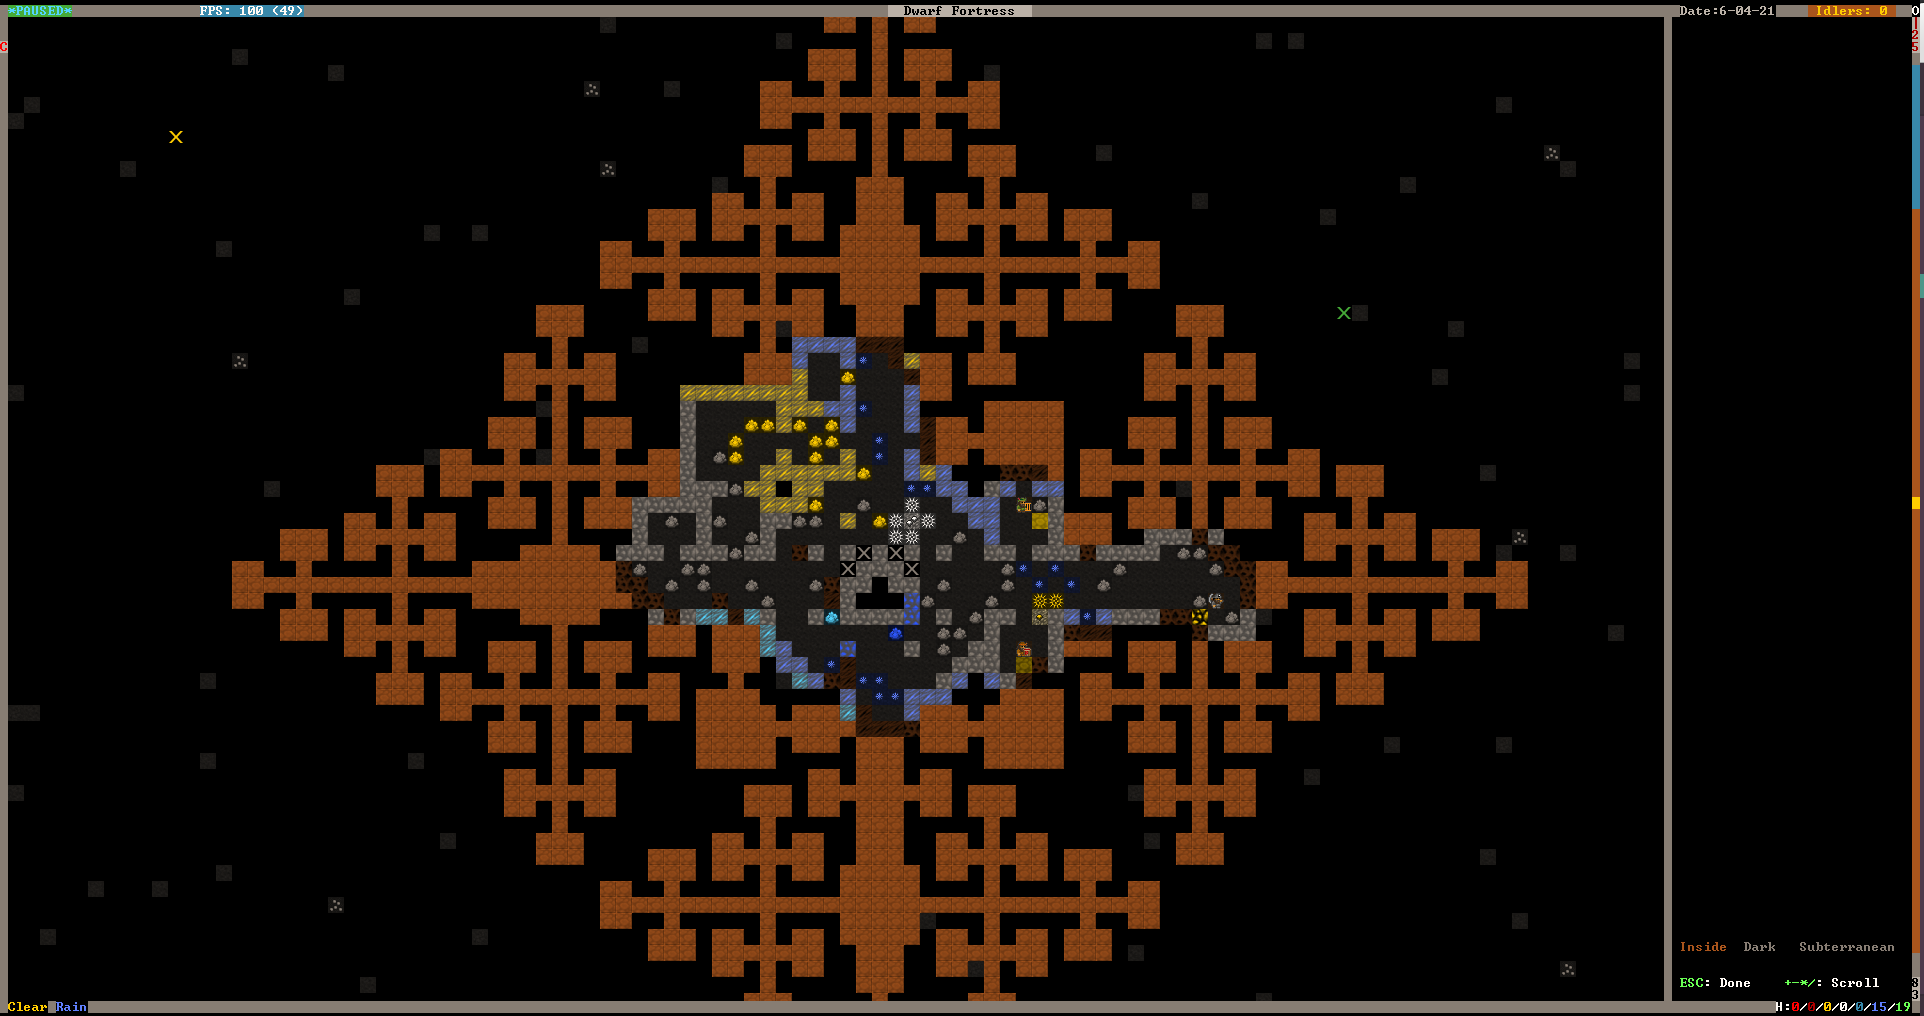
My white stone (granite) quarry, a few levels below the initial base:

The quarry, with some basic workshops.
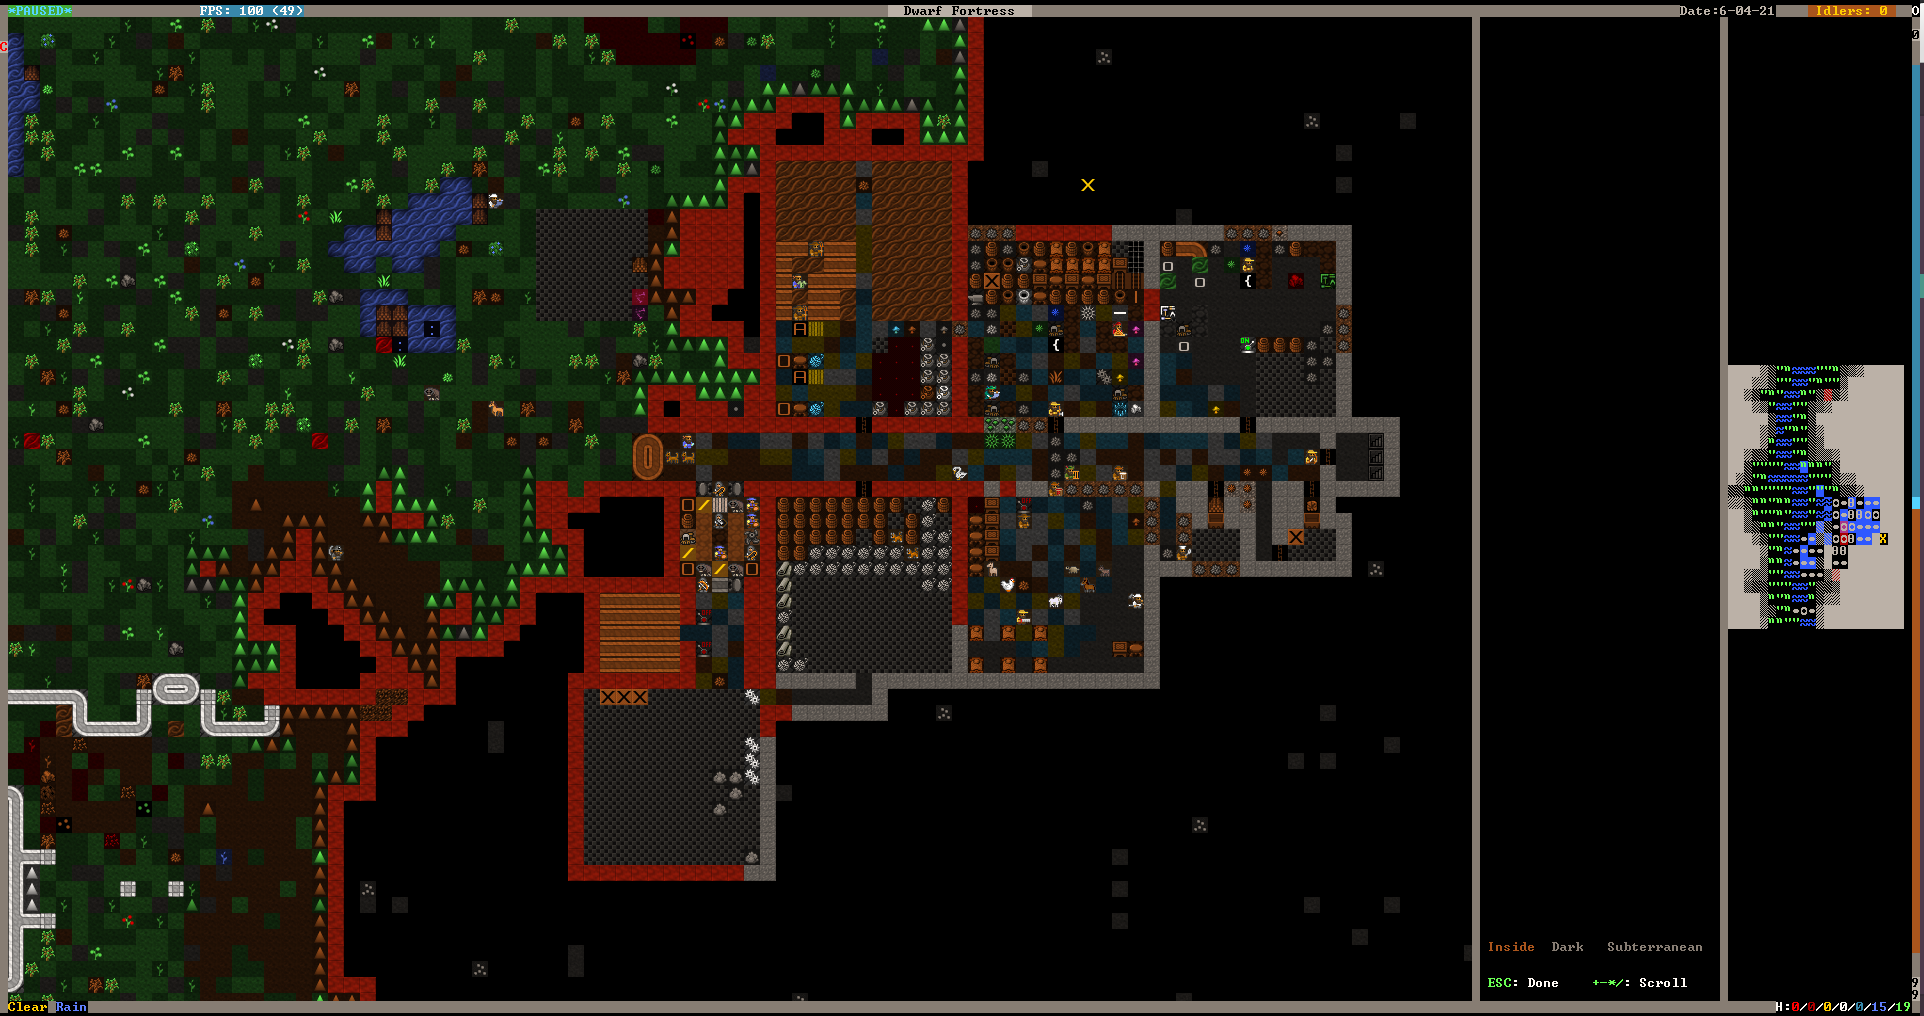
The eventual bedroom complex, one of two floors:
Eventual bedroom plan.
Next post, I explain what I did after the initial steps outlined in this post, and hopefully a bit about how I moved the river!